Over the years, I’ve moved more and more services I was hosting on Hetzner to other infrastructure providers due to pricing and interconnection issues. These days, only 2 small VMs remain but are now under scrutiny as well, as Hetzner has significantly increased prices for them. To make matters worse, such VMs are still advertised but often not available when I actually want to book them. So it was time to look for something else for small workloads that don’t require a lot of CPU power, RAM and storage.
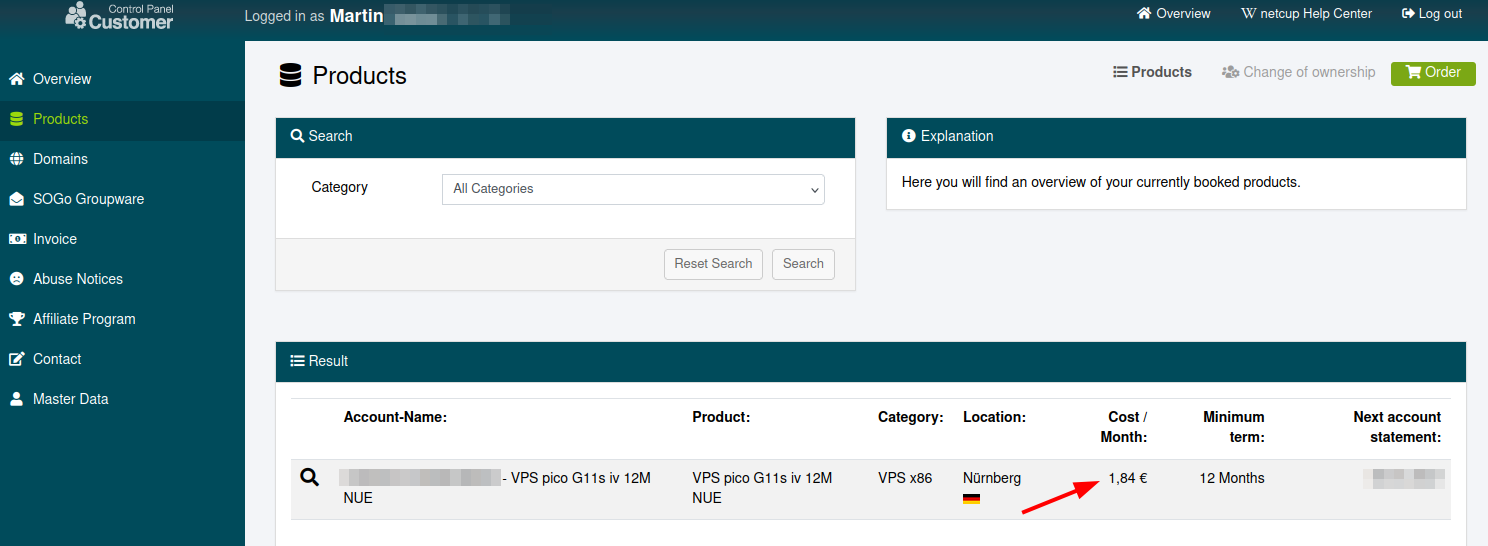
In the process of looking for alternatives, I came across Netcup and their ‘vServer Lite’ VMs with 1 GB of RAM, 1 x86 CPU core and 30 GB of block storage for €1.85 per month. The price includes taxes and a public IPv4 address. That’s less than 1/3 of current Hetzner pricing of their smallest VM, which, to be fair, has more of everything. Also, one has to sign-up for 1 year and one has to be careful not to miss the cancellation window at least a month before the year ends to avoid to pay for another 12 months if the VM is not required anymore.
Also important for me: Netcup is owned by an Austrian company and they state that the VM is hosted on a server located in Nuremberg, Germany. No hyperscaler involved, which is an important factor for me as well. All that being said, let’s have a look how Netcup VMs work and if the offer is any good.
Sign-Up and First Run
After signing up, it took a few minutes for an email to arrive with login credentials to their portal. Once there, I paid for the 12 months subscription with a credit card. After that, the VM is instantiated with Debian 13 Trixie by default and one can access it over SSH and manage it via their web portal.
At first I was a bit perplexed that Debian 13 was installed by default, because I wanted to install Ubuntu as that is what I am familiar with. I might have missed it, but it turned out during the initial configuration that one can (re)-install a large variety of different Linux flavors at any time including Ubuntu, Alma, FreeBSD, Arch. But since the VM was already running Debian 13, I decided to give it a try because I assumed that Ubuntu would probably only put further things on top that would consume more RAM. And since the tiny VM only has 1 GB of RAM, I don’t really need Snap and other goodies that just consume memory without really being used.
Moving the Blog
To see how well the VM performs and if there is any difference installing Docker on a Debian system versus Ubuntu, I decided to move my ‘docker-ized’ blog to the VM and run it there for a few hours. To get the blog up and running turned out to be straight forward, no difference to Ubuntu:
- Install Docker and docker compose on the VM.
- Copy/paste the docker-compose.yml file of my Caddy reverse proxy setup to the VM, create the docker network required for it with ‘docker network create caddy‘, and then start the proxy with ‘docker compose up -d‘.
- Un-tar a recent backup of the docker compose directory of my blog on the machine.
- Change the DNS entry of my domain name to the public IP address of the tiny VM.
- Run ‘docker compose up -d‘ in the blog’s docker compose directory.
All in all, this took around 10 minutes and the blog was up and running. Fabulous!
RAM Requirements
So how far do I get with 1 GB of RAM? After booting the OS, 166 MB of RAM was in use. During the download of WordPress and MariaDB as part of the ‘docker compose up -d‘ command for the blog, memory use went up to about 450 MB. Memory use then went down to 390 MB after the blog was up and running and went up again over time to around 500 MB once http requests started coming in. Yes, my blog is a small web site, so the tiny VM is totally able to handle the memory requirements of 20 years worth of blog posts and images.
CPU Load
Also, the CPU load was quite low as there are only a few HTTP requests per second to my online home. Response times for new pages were just as quick as on my ‘normal’ VM I run on my bare metal server that has more CPU cores and memory assigned as it hosts several other projects.
Network Speed
To see if uplink and downlink data throughput was limited in any way, I ran an iperf3 test in both directions and got 1 Gbit/s in one direction and 500 Mbit/s in the other direction, both of which are the limit of my iperf3 server. In other words: I couldn’t test the limits of the VM because my iperf3 server connection is too slow. So I think the VM will do for me from this perspective as well.
Summary
I came away very impressed from this first test! The VM feels snappy on the command line, requests to my blog were handled quickly, and there is still a healthy RAM margin for this application. In addition, Netcup’s web browser based VM management interface offered a nice surprise I will have a look at in part 2 of this series.