 Today another post in my popular series on historical computing. When the Busch 2090 microcomputer learning kit came out in 1981 it required the user to write programs on paper, translate the instructions to machine code and to calculate memory addresses and branch destinations himself. In an iterative development process this is more than just a bit painful as memory addresses of branch destinations change all the time as instructions are added and removed. Now that I’ve put my Busch 2090 tape emulator to good use I decided I needed an Assembler that does these things for me. As none exists so far, I decided to program one myself.
A Somewhat Unconventional Assembler
A traditional assembler takes a text file with assembly mnemonics and symbolic branch destination addresses and creates a binary file containing the machine instructions. When a debugger is available it also creates a file with information to link the symbolic branch destinations to memory addresses. This approach does not work well for the Busch 2090 because the assembler runs on a PC while the code runs on the Busch 2090 where no debugger and display is available that could show alphanumeric mnemonics and branch address symbols. The Busch 2090, however, allows to set breakpoints at memory addresses, single step through code and inspect registers on the hex display. It would therefore be good to know the memory address of each instruction and have them side by side with the assembly instructions when debugging a program that way.
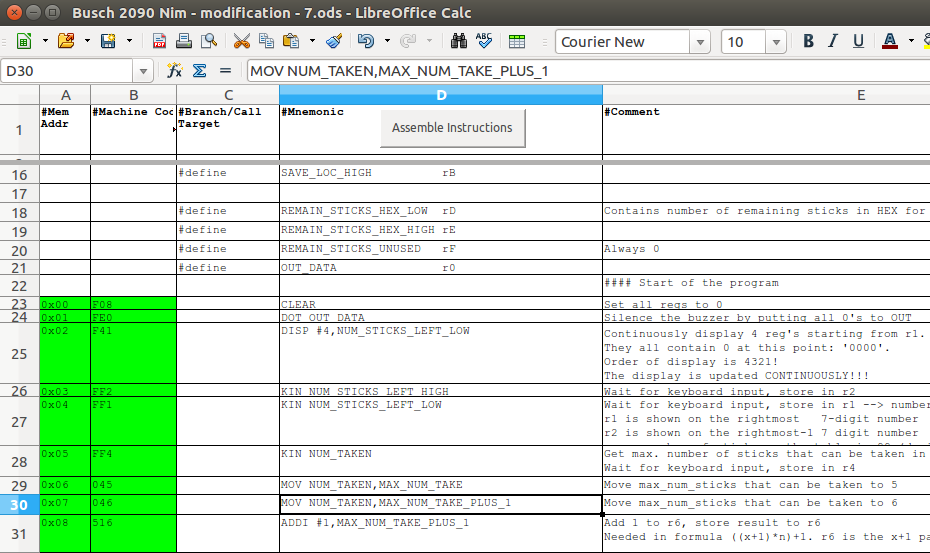
To accommodate for the different usage scenarios my assembler implementation takes a somewhat unconventional approach: The Busch 2090 assembly program is written in a Libreoffice Calc document. The assembler is contained in the Calc document and was written in Libreoffice Basic. In the Calc document, column 1 (memory address) and column 2 (machine code) are empty. Column 3 holds the symbolic branch destination addresses. Column 4 contains the Busch 2090 assembly mnemonics with 0, 1 or 2 parameters as shown in the screenshot above. Symbolic names for registers are supported as well. When clicking on the “Assemble” button, the assembler will run and fill out column 1 and column 2. Modified cells are marked in green if everything is o.k. If there was a syntax problem the corresponding cell is marked in red. Machine code translations which have been converted successfully but not yet been verified on a real 2090 hardware are colored in celestial.
After the assembly process has completed and all machine code cells are green or celestial, column 2 can be selected in Calc and copied/pasted into a text file. This text file can then be directly downloaded to the Busch 2090 with the Raspberry Pi tape emulator and then executed and debugged. After modifying a program, getting a new version of the program to run is as simple as clicking on the “Assemble” button again to update the memory addresses, machine code instructions and branch destinations and to download the result again. This is so much more fun than the paper approach.
And, I might add, this is probably the first assembler ever written in Libreoffice Basic… For the details have a look at the Codeberg project page.