In previous parts of this series I’ve been looking at CPU power, GPU power, virtualization, remote graphical GUIs and networking of my refurbished Z440 workstation. The next thing on my list of things I wanted to improve in my computing setup was storage.
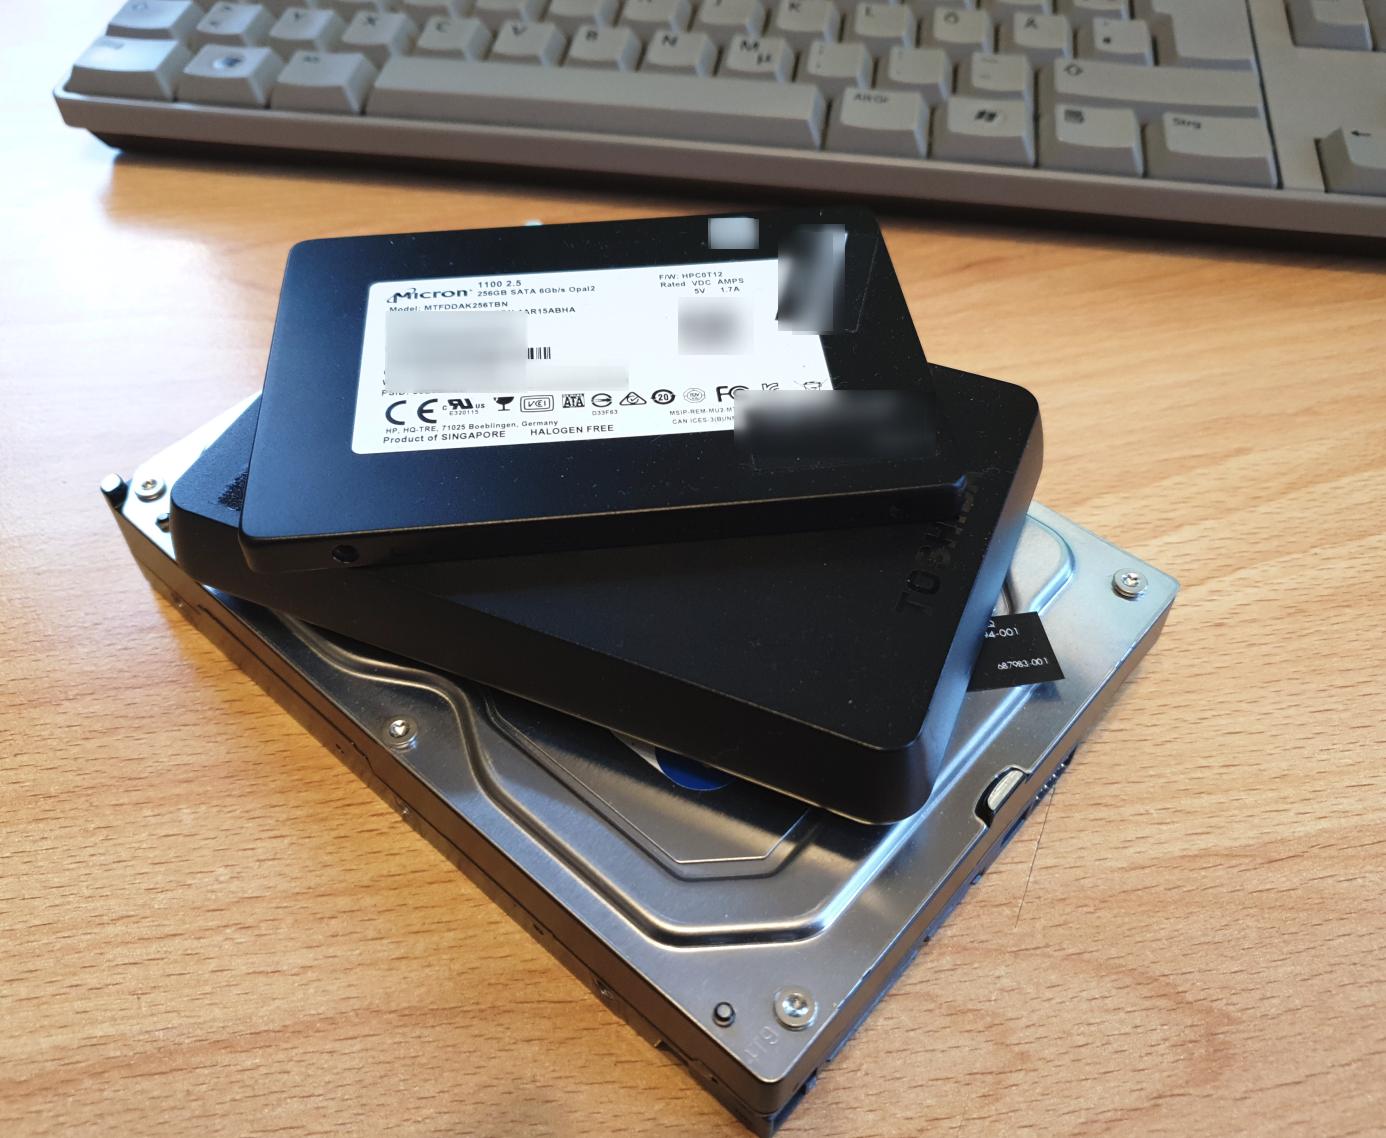
So far, I was mostly using ext4 filesystems on partitions on physical disks. This has served me well over many years, it’s a straight forward approach and disk drives were usually bigger than the amount of space I required. On the workstation, however, this would have been limiting as I had two spare 2 TB SSDs that I wanted to combine to get a filesystem on which I could store up to 4 TB of data. Also, I wanted to have the possibility to extend this later. I discounted spinning disks with much higher capacity (for the moment), which could also have solved my storage problem, as the workstation is below the desk and I wanted to have a quiet system.
Different Choices
Ext4 is obviously not the right choice for a multi drive / single file system setup, as it can’t span multiple disks on its own. I could have used LVM to create logical volumes that span several drives and then run ext4 on top of this construct. I’ve done that in the past and was not very happy with the approach. Too complicated if you don’t work with it every day. So I was looking for something different and in the end, I decided to give ZFS a try.
ZFS is Huge – But Let’s Focus on the Task at Hand
ZFS is huge and can do everything short of cleaning your kitchen. It combines logical volume (drive) management, redundancy, and the file system on top. And besides it can do snapshots, remote synchronization and tons of other things. For a high level overview and the details, I recommend to look at the ZFS Wikipedia entry or this Arstechnica post to get an overview of what ZFS can do. In this post I just want to focus on how I decided to use ZFS for my ‘simple’ requirement of spanning a filesystem over several physical SSDs. And it turns out that this is actually a straight forward thing that can be achieved with just a few commands.
My Setup
I have two SSDs in my workstation, each with a capacity of 2 TB. On the first drive (sda), I have a 100 GB system partition from which I boot the operating system (Ubuntu 20.04). I then used a part of the remaining 1.9 TB space on the SSD for a temporary data directory that has served me well for two weeks until I had the time to have a closer look at ZFS. The second 2 TB SSD in the system (sdb) was unused so far, so I decided to start with this one and then extend the capacity with the empty space on the first SSD once I figured out how things are working. On purpose I did not want to add redundancy, e.g. via ZFS RAID. Instead, I chose to do offline backups to hard disks the traditional ‘rsync‘ way and live with the potential downtime if one of my SSDs should fail. That’s ‘cheaper’ than adding another SSD to the setup.
ZFS and Encryption
ZFS has built-in encryption and I heard that with Ubuntu 20.10 and ZFS 0.8.4 it is pretty performant. I also heard (but have not investigated further), however, that ZFS 0.8.3 that is part of Ubuntu 20.04 is not doing so well in terms of encryption performance. Instead, ‘people’ recommended using LUKS below ZFS for encryption. So this is what I have done, as I have a bit of experience with LUKS on the command line. For this post, however, I will skip this part as I wanted to focus on the ZFS. I’ll describe the LUKS/ZFS interworking in a follow up post.
The Practical Part
So having said all of this, let’s get to the practical part. Instead of configuring the two SSDs straight away, I decided to start with the second SSD, gain some ZFS experience and then add a partition on the first SSD to my ZFS setup later. One can of course do this on real hardware straight away or, which is what I did, use a virtual machine with 3 virtual drives (sda, sdb, sdc) as a playground. This way, no damage is done and no data is lost that can’t be regained with a conveniently placed VM snapshot.
The first thing to do is to install the ZFS tools required for the job:
sudo apt update && sudo apt install zfsutils
Different Disk and Partition Sizes
Next, the two disk drives needed to be formatted and partitioned. ZFS can handle physical drives and partitions on them of different sizes to form a ‘pool’, which is exactly what I needed for my target system. As you might remember from above, my first SSD in the ‘real system’ already contains two partitions, one for the EFI bootloader and one for the Ubuntu system that should not be part of the ZFS system. I simulated this by creating two virtual disks for the VM with different sizes. In the following description I will use the drive names ‘sdb’ and ‘sdc’ for the first and second drive and configured them outside the VM to have different sizes (25 and 50 GB).
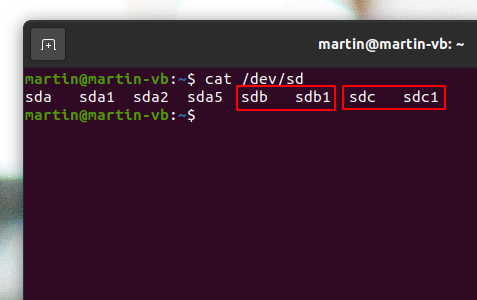
To use the disks for ZFS, they need to get a partition table and a partition each. I used fdisk for the job on the command line, but a GUI utility such as ‘gparted’ or ‘disks’ will also do the job. The result of this should be two partitions, ‘sdb1’ and ‘sdc1’ both empty and without a file system as shown in the screenshot on the left.
Creating a New ZFS Pool and Watching the Ashift
So there are two partitions now on two different disks that could be used straight away to create the ZFS pool which I will then use for the file system. However, due to my migration strategy on the ‘real’ machine, I wanted to start with one partition first, get things to work and then add the partition on the first drive to the ZFS pool later. So I’ll do the same here which also demonstrates nicely how a ZFS pool and the capacity of a file system can easily be extended later by adding additional drives to the pool. So here’s the command to create the ZFS pool with a single partition:
sudo zpool create -o ashift=13 -f martin-pool-1 /dev/sdc1
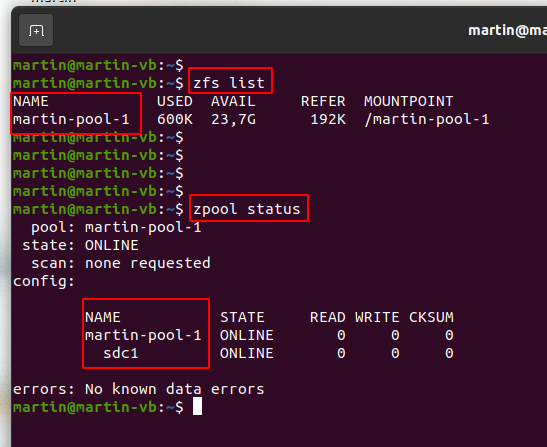
This creates a new pool (martin-pool-1) with only a single partition (/dev/sdc1). The command is pretty much self explanatory apart from the ashift=13 parameter. A number of sources point out that some SSDs are reporting a false block size to the operating system for backwards compatibility reasons. This is what my SSDs do for example. Instead of reporting the correct block size of 4096 bytes they report 512 bytes. Things would still work but on the hardware level, the SSD would always have to write a full 4096 byte block at once because that is the ‘real’ minimum block size. In other words, the SSD would wear out a lot faster than if ZFS used 4096 byte blocks. For details see here. The ashift parameter set to 13 tells ZFS to ignore the block size reported by the device and instead use a block size of 2^13 bits = 8096 bytes. That’s twice the size of the physical block size of my current SSDs. A number of sources recommend this to be able to add drives in the future to the pool that use 8k blocks without getting into block size / write over-amplification issues again. So that’s what I did. The screenshot on the left of the paragraph shows how ZFS sees the system after executing the command above.
And finally, one or more file systems have to be created in the ZFS pool (that only spans one partition for the moment). I wanted to have two file systems let’s say one for ‘data’ and one for ‘experiments’. Both will share the pool capacity and will take as much as they need unless they are restricted to a maximum size. I decided that they both can use as much storage from the pool as they like. Here are the commands to create the file systems and to give them the user and group rights so my default user ‘martin’ can access them:
sudo zfs create martin-pool-1/data
sudo zfs create martin-pool-1/experiments

sudo chown -R martin:martin /martin-pool-1/data
sudo chown -R martin:martin /martin-pool-1/experiments
The screenshot below shows how this looks like from a ZFS point of view. The pool size is given as 23.7GB and can be used by both file systems. Note that the file systems (‘data’ and ‘experiments’) are referred to as ‘datasets‘ by ZFS.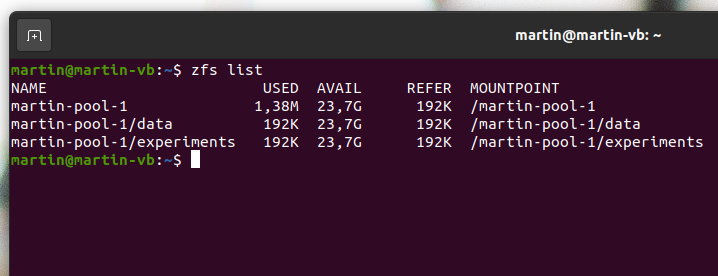
And that’s it, we are done! Creating a ZFS pool and a file system on top with two commands + setting access rights. Incredible!
Adding the Second Partition
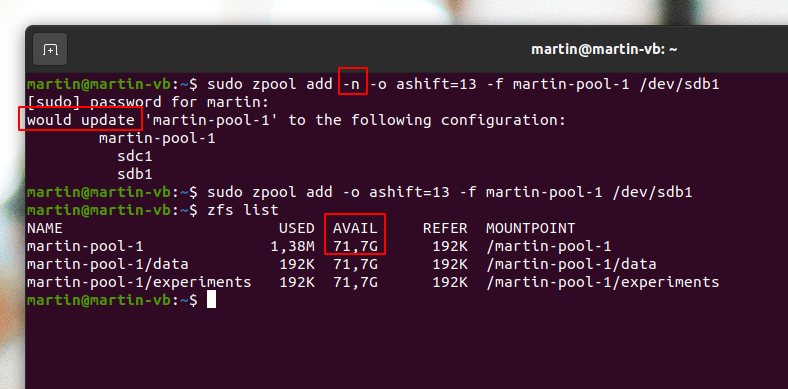
And finally, let’s add that second drive to the pool so both ‘data’ and ‘experiments’ can have more space. Again, only a single ZFS command is required. As this action can’t be reverted without destroying the pool and all data in it, it’s perhaps a good idea to do a dry-run first by adding the ‘-n’ option to the command:
sudo zpool add -n -o ashift=13 -f martin-pool-1 /dev/sdb1
And there we go, after running the command again without the ‘-n’ parameter and issuing the ‘zfs list‘ command again, the available space has gone up from 23.7GB to 71.7GB!
So far so good, that’s where I wanted to be, except for the missing enryption (with LUKS). However, adding LUKS will only slightly change the procedure given above and I will describe that part in a follow up post.
For the moment I’ll leave you with this link to a great ZFS cheatsheet and the suggestion to have a look at ZFS snapshots next!