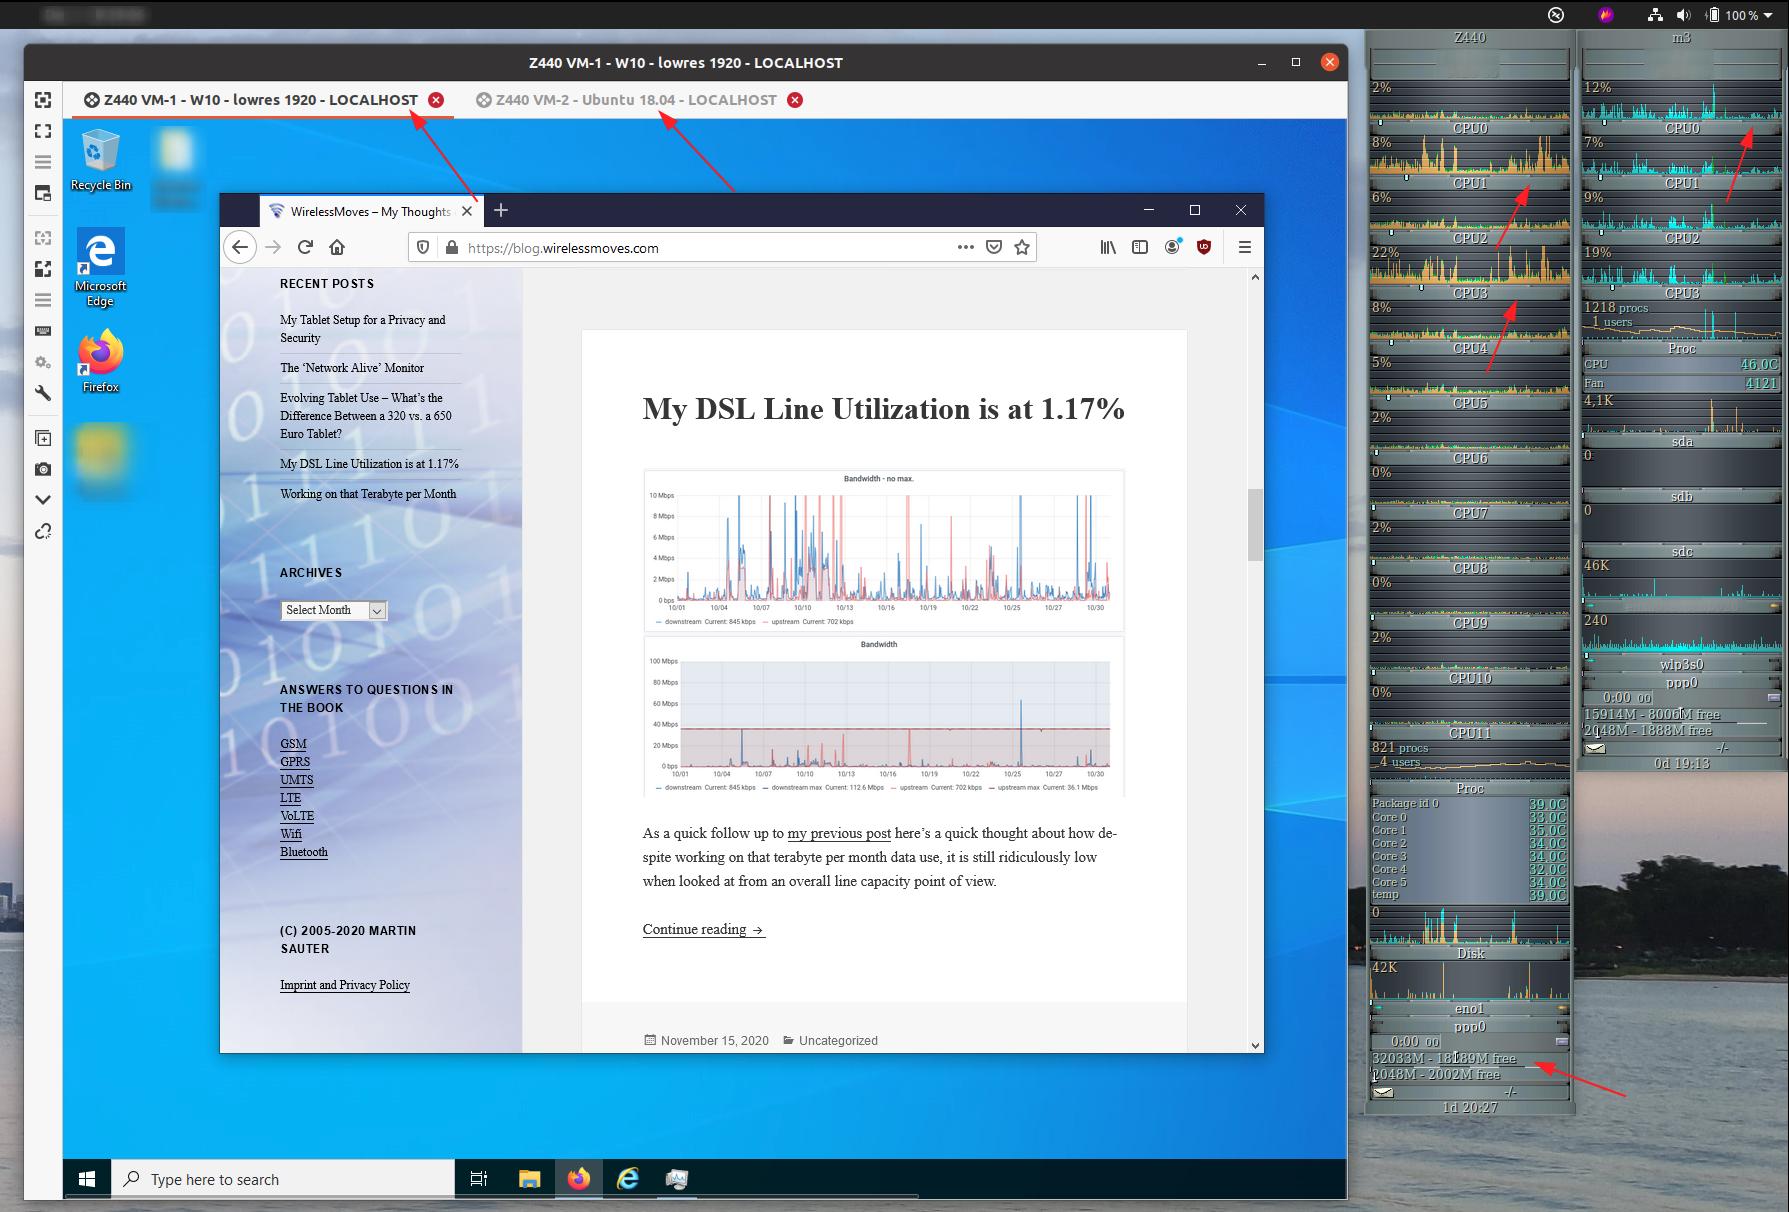
In addition to running computing intensive applications on my new (refurbished) HP Z440 workstation the other main use case for me is to offload the virtual machines I am running on my notebook today. While I do have 16 GB of RAM in my notebook it becomes more and more difficult to run two virtual machines at the same time. Memory requirements are growing and particularly Windows starts doing all sorts of things in the background when it thinks it is ‘unused’ for some time, which is a heavy toll on CPU load, power consumption and speed while I’m working on the host system. Also, I do have some applications I run in a virtual machine which are heavily single threaded and some graphical functions are relatively sluggish on a 5 year old mobile processor. So more often than not these days, I only run one virtual machine at a time and in the case of the Windows VM, I pause it whenever I don’t use it so Windows doesn’t run wild with background tasks. Long story short, the idea with the workstation is to run those VMs on that machine and to remotely access their ‘virtual’ screens over the network. Added benefit: With 32 GB of RAM on the workstation, I can be much more generous with assigning RAM to the VMs than on the notebook.
Running virtual machines on the desktop with a GUI is straight forward. Virtualbox has excellent features for this such as host/guest integration for the clipboard and resizable virtual guest displays / windows so I can adapt the screen size, e.g. of Windows running in a virtual machine at runtime. An essential feature for me! Running ‘headless’ virtual machines on my cloud server at home or in a data center is also straight forward as there is no GUI. But running virtual machines on a remote server and accessing their virtual screens remotely was something new for me and there are several ways to do it, all with their pros and cons.
While I use KVM/Qemu/VMM for remote headless virtual machines on my cloud server at home, I am using Virtualbox on my PC because of the excellent desktop integration. The KVM competition may have caught up in terms of GUI/desktop integration of guest VMs in recent years but that’s for another day to explore. So I stuck to Virtualbox and started experimenting with how to make it work best in combination with a remote server.
Approach 1: Running VMs on the Workstations Desktop
My first approach was to use a VNC server on the physical display of the workstation so I could access it remotely and show it in a window on the 21:9 screen I have attached to my notebook. On the workstation display I then ran Virtualbox and started a number of guest VMs. Their desktops are then shown in windows on the workstation desktop and, via VNC, on the large display connected to my notebook. In effect, that’s the same setup I use for local virtual machines on my notebook with VNC thrown in for remote access. This works great but has one main disadvantage: For this to work, a physical display needs to be connected to the remote workstation and I have to be logged in for this to work. The physical display can be switched off but it still needs to be connected. It is possible to work that way remotely but it’s not ideal. The second problem with this setup is that someone else can see what I’m doing when the screen is switched on. That’s less of a problem in my case as my workstation is at home but for a business setup, that’s far from ideal.
Approach 2: Using VirtualBox’ Built-In RDP Server
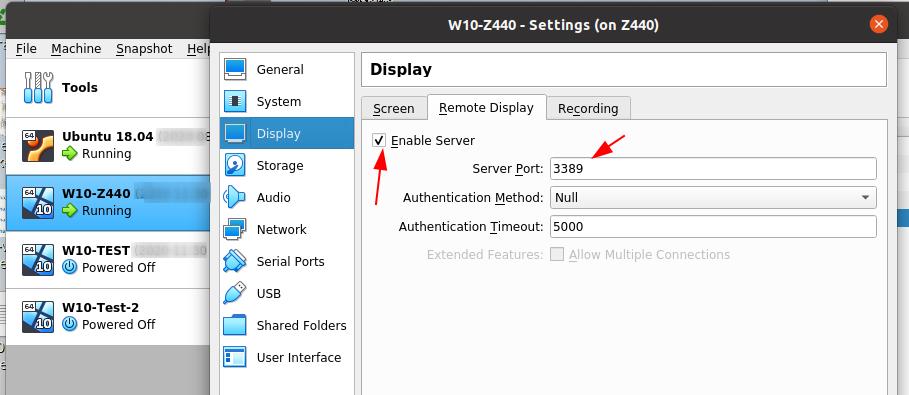
A better way to use virtual machines with a GUI desktop remotely is the RDP server built into Virtualbox. To the guest OS in the virtual machine this is invisible, it just continues to make it’s output to its virtual GPU. The RDP server can be activated/deactivated for each virtual machine separately. By using different TCP ports for each VM, it’s possible to remotely access them simultaneously. On the other end I am using Remmina, a great tool for VNC and RDP remote desktop use. In the local network this works great and the remote desktop reacts very smoothly to input. One does slightly notice that one works on a remote desktop when moving windows or large parts of the screen change quickly, e.g. when scrolling down a page with lots of images in the web browser. But it is totally usable and not uncomfortable. And, as expected and hoped for, the single core speed of the Xeon E5-1650 v4 beats my the i5-5300U in my X250 notebook by quite a bit. That single-threaded Windows application that is a bit sluggish when run in a Windows VM on the notebook runs much more smoothly on the server!
Approach 3: Securing Approach 2
When I start a VM on the remote workstation it starts with a display window by default on the workstations desktop. That’s not ideal for security. Also, by default, no authentication is performed for the RDP session so anyone in the local network can access them. Also not ideal.
The fix for the VM’s window on the remote workstation is to start the VM in ‘headless’ mode so the VM’s virtual display can only be accessed over RDP. First problem solved. I then had a go at securing RDP but I failed to configure authentication. I’m sure it’s possible somehow but I didn’t want to go in this direction anyway so I gave up on this after a short while. To be revisited. What I wanted to have in the first place is to use RDP in combination with an SSH tunnel which would take care of authentication and encryption in one go. This combination is easily set up in the Remmina RDP client with the click of a button. But this only fixes the client side. On the workstation, the RDP server can still be reached by anyone without SSH port forwarding, as the TCP port used by RDP is open for all incoming connections and not only for localhost connections used by the SSH tunnel. In other words, Virtualbox has to be persuaded to only allow localhost connections to the RDP server’s TCP port. There is no way to configure that in the Virtual Box GUI configuration tool. However, it is possible to limit RDP to localhost via the command line. Here’s an example how to start a VM in ‘headless’ mode and limiting RDP to localhost:
nohup VBoxHeadless --startvm "VM NAME" --vrde on --vrdeproperty "TCP/Ports=3390" --vrdeproperty "TCP/Address=127.0.0.1" &
Note: ‘nohup‘ and ‘&‘ are thrown in for good measure so I can later exit the SSH session to the workstation without loosing the virtual machines.
Working Around a Remmina SSH Tunnel Bug
One thing that annoyed me for a few days was that Remmina would often throw an error message and stop when starting an RDP connection over an SSH tunnel. After re-trying two or three times, however, the connection would be established. Perhaps Remmina tries to contact the RDP server on the workstation over the SSH tunnel before the tunnel is fully in place? So I changed my configuration and start the SSH tunnel for port forwarding separately from Remmina. Here’s how the command lines look like for a single port, and for multiple ports for several VMs:
ssh -N -L 3389:localhost:3389 IP-ADDRESS-OF-WORKSTATION

ssh -N -L 3389:localhost:3389 -L 3390:localhost:3390 -L 3391:localhost:3391 IP-ADDRESS-OF-WORKSTATION
This completely fixes the problem!
RDP Drawbacks
So far so good, but there are two drawbacks: RDP requires A LOT OF BANDWIDTH and is latency sensitive! It works fine in the local network, but 50-100 Mbit/s spikes are not out of the ordinary. And it also benefits from an almost zero latency. This becomes evident when accessing the VMs over the Internet. I do have a 40 Mbit/s uplink, so bandwidth is not the main issue. However, the latency of around 50 ms slows down RDP to a point where usability significantly degrades.
Another quirk that sometimes but not always appears is that RDP clipboard sharing becomes very slow. When this happens and I select some text in the guest, the connection freezes for 5 to 10 seconds. The text is eventually copied to the host’s clipboard but that interruption is rather irritating. Fortunately, it’s possible to disable clipboard exchange in the settings but that’s not really a solution. I do have a VNC setup in mind to fix both issues but I haven’t tried it yet. So that’s for a future post.
Resizing Guest Screens
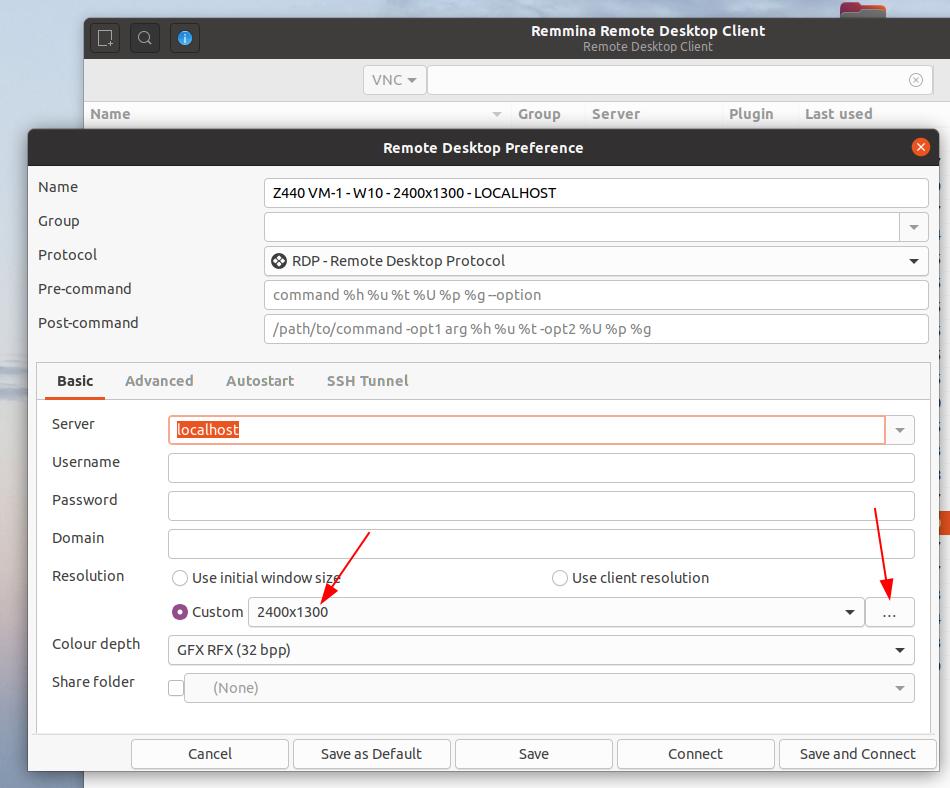
 One important feature is the ability to resize guest VM display size to adapt to changing conditions on my notebook. Sometimes I have it connected to an external 21:9 display, sometimes I don’t. Sometimes I need a large guest desktop, at other times smaller is better. On local Virtualbox guests, I can just resize the window. Resizing the screen of a remote VM works by changing Remmina’s RDP connection settings. To change the resolution the connection has to be cut, the settings have to be changed and then the RDP link has to be established again. The VM on the workstation then notices that the client has requested a different resolution and changes its virtual display size accordingly. Screen resolution values can be customized to any x/y pixel combination so one can build something that exactly fits the use case. Not as seamless as just resizing the window but usable in practice.
Conclusion
While it has taken a bit of effort to come to the current setup, my virtual machines run noticeably faster now than on the notebook. This was the main driver for this project. Also, I can give them significantly more RAM to work with and my notebook has significantly more resources for other processing intensive things such as video conferencing. Mission accomplished I would say!

