I’m in the process of changing my backup and restore setup for critical notebooks of the household. Instead of keeping a backup notebook synchronized and use it for other backup tasks in addition, I have moved to a dedicated backup server. To cover the case of a critical notebook or flash drive failing, I now have duplicates of those Linux desktops with all user data ready to go on NVMe drives, which I can insert in a backup notebook when required. The slight catch: Extra work is required to keep those NVMe drives up to date: So far, my approach was to insert the physical drives in a notebook, update them with the latest system patches and user data, and then remove the drive again. This works well but is a bit time consuming. But there is a more easy way to do this!
Instead of using real hardware, it’s possible to use a virtual machine on my notebook to simulate a real notebook, and boot the VM from the physical drive in a NVME/SATA to USB adapter. For Virtualbox, a number of sources on the Internet describe how to declare a physical drive as a disk image. I could make this work, but had to run Virtualbox as root. Not ideal.
A USB Drive Instead of a Virtual Drive
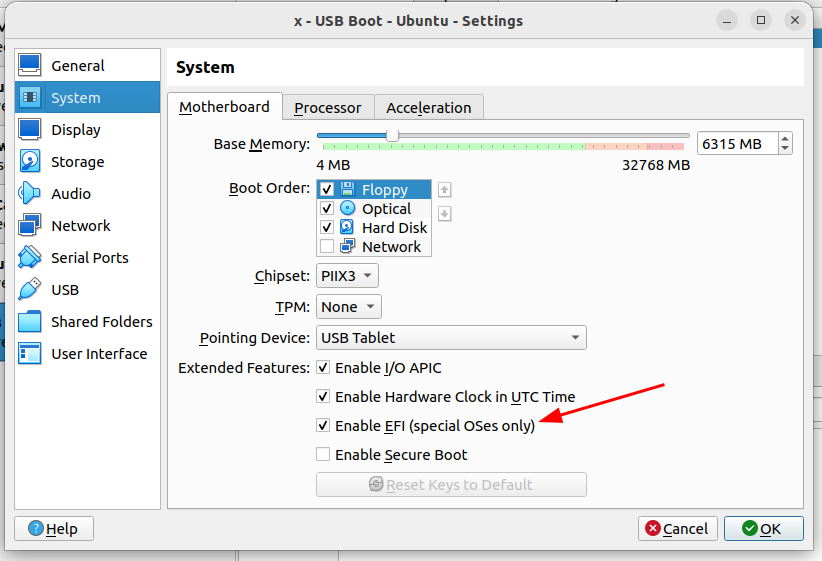
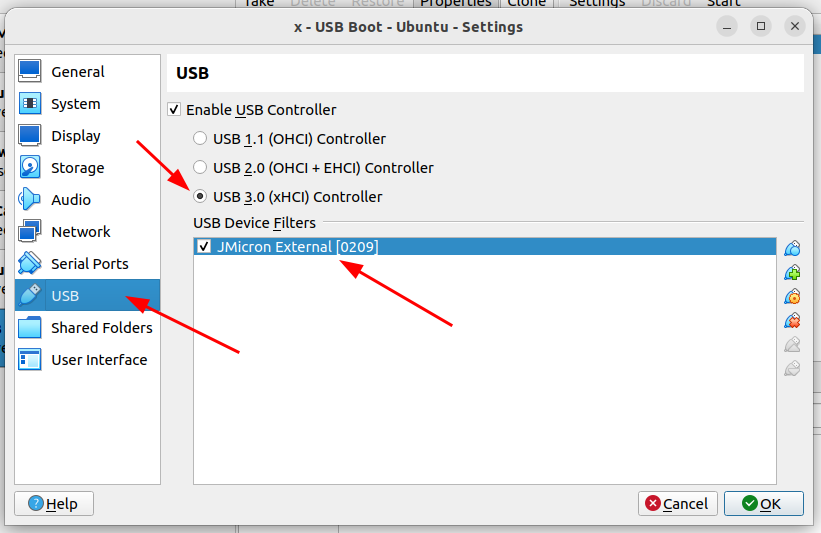
I then tried to just map the USB drive into the virtual machine to see if it would boot form there. After all, one can boot a real notebook from a USB drive. At first, that didn’t work. But then I remembered a chat with a friend at the coffee machine at work some months ago, where he told me that one had to activate the special EFI boot option in the VM settings. And indeed, after checking that box (see screenshot above), the VM booted from the mapped NVMe drive that was connected to the host via a USB adapter.
As Linux auto-detects hardware, it doesn’t matter that the virtual hardware is different from the real hardware. Everything, including networking just runs out of the box. An important point: If one doesn’t require special features such as clipboard synchronization, display resolution auto re-size, etc., one doesn’t even have to install the Virtualbox Guest Additions. This way, the setup remains ‘virtually untainted’, and it’s still possible to select a suitable virtual screen resolution inside the VM by right clicking on the Ubuntu desktop and selecting ‘Display Options’!
What About Speed?
In practice, the system in a (Virtualbox) bottle practically boots just as fast as on real hardware. Once on the desktop, I can then upgrade the system and synchronize the user data, the later by mapping a backup drive into the virtual machine and then using rsync. Just like what I would do on a real notebook! The notebook in a bottle also syncs the user data just as fast as the real one, the limit is the data transfer speed of around 100 MB/s of the backup hard drive.
A really nifty setup that significantly reduces the time to keep a backup system current!
P.S. And in case you were wondering, the title of the post was inspired by TNG episode 6/12.