As you probably know, I’m firmly rooted in the Linux camp. Still, for some work related applications I have to use MS Windows. But at least it’s in a virtual machine… For that purpose, I have a Linux based server at home that runs, among many other things, a Windows 10 installation in a Virtualbox VM. The problem: In 2025, support for Windows 10 ends, so an upgrade to Windows 11 is required. Unfortunately, upgrading W10 to W11 in the VM is not straight forward, as the server is 8 years old, and MS thinks the hardware is too old for W11. Particularly, the server does not have a Trusted Platform Module, which is one of the preconditions to upgrade W10 to W11. Eventually, I managed to update the VM, but it was quite an uphill battle. As there were too many unknowns, I thought I’d start to get some experience by installing W11 in a VM from scratch and then build on the knowledge gained from this. As the whole exercise was quite a bit of a learning exercise, I’ll split the topic into a number of blog posts. Enjoy the ride!
Virtualbox and W11 in the Old Days
When I approached the topic of how to install W11 in a Virtualbox virtual machine a number of years ago, it was a bit of a complicated thing. At the time, TPM, EFI and Secure Boot were missing in Virtualbox, so workarounds were required. Fast forward to 2024 and Virtualbox now has all of those features.
Installing W11 in a VM on Current Hardware
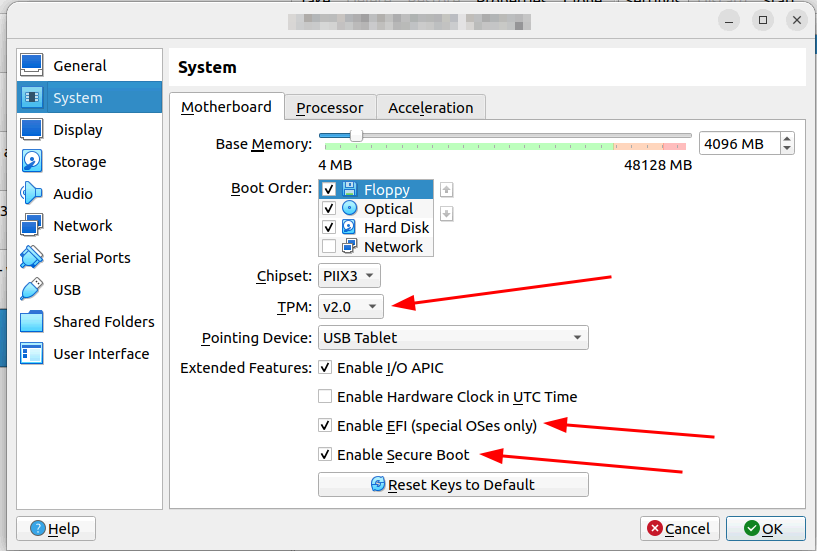
To start as simple as possible, I decided not to go for a W10 to W11 upgrade in the VM on my ‘old’ server straight away, but to install W11 into a fresh Virtualbox VM on my current notebook. The notebook has a 13th generation Intel core processor and a Trusted Platform Module (TPM) 2.0, so no problems in that area were to be expected. And indeed, such an install works out of the box. After downloading the W11 ISO file from Microsoft, the only thing I had to do was to tell Virtualbox to use it as an installation medium for a new VM. It automatically recognizes that W11 is to be installed and configures the new VM with a (virtual) TPM, UEFI and Secure Boot, all of which are disabled by default when installing other operating systems such as Linux.
Installation then takes around 20 minutes, including an additional reboot to get around setting up or using an online account. For details how to install W11 with a local account only, see here. What you get after the installation procedure is a not-activated W11 that works, but the Internet knows that it will start showing watermarks and reminders to buy a license over time. Good enough for my experiments.
Move the W11 VM to Old Hardware
The next step on my W11 VM upgrade discovery trip was to see if I could move this virtual machine from my notebook to my server at home with the older hardware. According to the hardware requirements, the Intel(R) Xeon(R) E5-1650 v4 CPU is not supported by the latest version of W11. Also, the server has no TPM. But it turned out that W11 didn’t care much, it just runs fine on that CPU from 2016. It is at this point I fully realized that it doesn’t matter if the host has a TPM or not, as the VM uses a virtualized TPM which is totally independent of any hardware TPM of the host.
Note: Before moving the VM image folder to the target host, remove the W11 .iso file reference, as otherwise there is a somewhat obscure error message while adding the VM on the target system.
W11 Direct Install on the Old Hardware
All right, next step: Install W11 directly on the server with the old CPU and without a TPM: No problems at all, the installer didn’t mind the old host CPU and just installed W11 in the VM without any warnings or complaints. Nice!
Next Steps
So far so good, my take away from this is that I could get a fresh install of W11 running in a Virtualbox VM on old hardware, which was 90% of what I needed, but, as it turned out, only 10% of the overall work required to get my existing W10 VM with a valid license upgraded to W11 and running on the old hardware. More about that in the next post.