Back in 2016 and 2017 I had quite a number of articles on NB-IoT, the Narrow Band Internet of Things technology that can run alongside LTE to connect things to the Internet over the cellular network. From being very power efficient to run over years on batteries to increased in-house coverage, the standard contains a lot of bells and whistles to address a wide variety of use cases. While I believe that ‘connecting things’ is the next big thing after mobilizing the Internet, it’s been very slow in the making, at least when it comes to cellular connectivity. I would have been quite keen to experiment with NB-IoT but up to now I didn’t come across devices and SIM cards that could be bought that would support it. Until a few days ago that was when I discovered an NB-IoT module for the Raspberry Pi on Amazon so it was finally time to go from theory to practice on the technology.
How To Get A Module and A SIM?
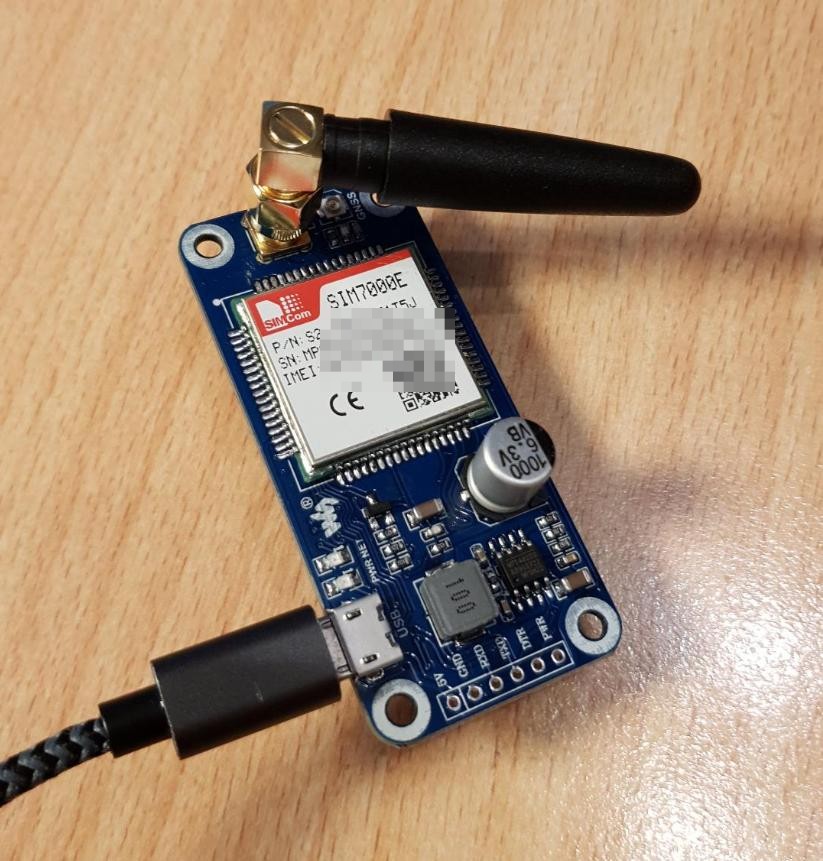
I started to get my hopes up to finally try the technology in practice when I came across this Waveshare NB-IoT and CAT-M1 device based on a Simtech 7000E module that would connect to a Raspberry Pi. At around €40 euros a piece it was cheap enough to give it a go. But wait, a module is no good without a SIM and subscription and getting one is anything but straight forward from a mass market point of view at this point in time. Perhaps that is part of the problem why the technology is so slow to start?
NB-IoT has been deployed by quite a number of network operators in different countries so your luck with a subscription may vary. For Germany you could try here, for Ireland, Italy, Czech Republic, Germany, Australia, Spain, England and the Netherlands you might want to have a look at a combination of Arduino module and SIM card based module here.
Getting the Module to Connect To The Network
So once I had a module and a SIM card with NB-IoT subscription I had to hope I lived in a place where the technology is already deployed. And yet another challenge was to get the module up and running, as NB-IoT connectivity is a bit different from the ordinary cellular stuff people are used to. The technology is called Narrow Band IoT for a reason! Despite being based on the IP protocol, the technology is not made to transfer a lot of data. Quite the contrary, the technology has been optimized for devices that just transfer a few bytes a day. So the Simtech module used by the device I bought and also other NB-IoT modules I came across offer special AT commands to establish TCP or UDP connections to servers on the Internet to exchange data. You can find the details in Waveshare’s/Simcom’s AT manual here. I case you haven’t grown up with modems in the 1990s you might have no idea what I’m talking about here. But fortunately, Wikipedia is here to help.
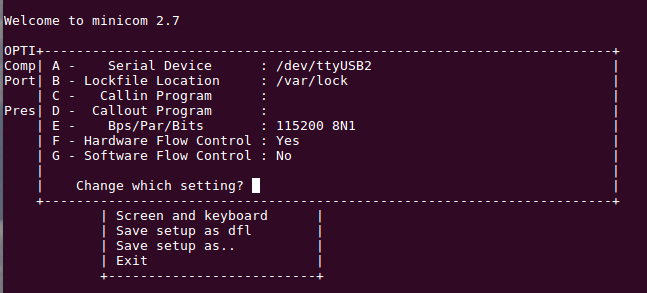
In the case of my Waveshare module, I discovered that it doesn’t only talk to Raspberry Pis via the standard Raspberry Pi connector but also over a serial port emulation over USB directly with PCs. Power and connectivity run over the same cable, no need for a Raspberry Pi for the basics. In case of Ubuntu 16.04, the operating system detects five serial interfaces that serve various purposes. For my purpose of getting a feel for the technology, ttyUSB2 was the right place to start by installing the Minicom terminal emulation program. Again, if analog modems were your thing through the 1980s and 90s you feel right at home! If not, it must look super arcane and strange. In my case I had to run Minicom as root and put /dev/ttyUSB2 into the communication settings menu (CTRL-A – Z – o) and enter the port settings there. There doesn’t seem to be a command line setting for this.
Once done, the Simcom module should print its name and version information text after it receives ‘ati’ + ENTER (ati stands for AT Info). With ‘ate’ (AT Echo), the module returns the characters you type in which is quite helpful to see what is typed from now on. The next thing to find out was to which network and radio technology the device had connected to. For the Simcom based Waveshare module, ‘at+cpsi?’ does the trick. In my case I got the following resonse at first:
at+cpsi?
+CPSI: GSM,Online,262-02,0x972d,1660,58 EGSM 900,-56,0,51-51
That’s not quite where I wanted to be for two reasons. First, I was on the Vodafone Germany network (Mobile Country Code (MCC) 262, Mobile Network Code (MNC) 02) which is neither the network I wanted to be in, nor the right network technology. Therefore the next thing to do was a network search with the ‘at+cops=?’ command which presented me with the following (formatted nicely for clarity):
at+cops=?
+COPS: (2,"262 02","262 02","26202",0),
       (1,"262 03","262 03","26203",0),
       (1,"262 01","262 01","26201",0),
       (1,"262 01","262 01","26201",9),
       (1,"262 02","262 02","26202",9),,(0,1,2,3,4),(0,1,2)
Apart from the MCC+MNC code (262 = Germany, 01 = T-Mobile, 02=Vodafone), the last number is of particular interest, 0 stands for GSM, 9 for NB-IoT. So what I wanted to do is to get on the 262 01 (T-Mobile) NB-IoT network. So first I had to change the network as follows:
at+cops=1,2,"26201"
It takes the module a bit to change the network but after it responded with ‘OK’, another ‘at+cpsi?’ command revealed that the module had changed the network but was still on GSM rather than on NB-IoT. The following command encourages the module to go to the NB-IoT network:
at+cnmp=38
By now you must have figured out that I had to read the AT-command manual of the module quite intensively. Running the ‘at+cpsi?’ command again revealed that I was finally on the right network and that the module was attached:
+CPSI: LTE NB-IOT,Online,262-01,0xE2A4,26569998,308,EUTRAN-BAND8,3740,0,0,-5,-77,-71,13
There is quite a bit of network information in that line, I leave it to the interested reader to figure out the details with Simcom’s AT-command manual.
So far so good, I was on the network now, but how do I transfer data now!? Again, it took me quite a bit to figure out how to use the right AT commands for this and if you are still with me at this point in the article, I’m sure you’ll enjoy part 2 that I’ll publish soon that will go into the details of that.