Interesting Tidbits from the German Telecoms Regulator Report 2013

A few days ago the German infrastructure regulator (BNetzA) has published its yearly report for 2013. Like every year it contains very interesting information that give a lot of insight, especially when comparing the numbers to previous years. For the moment I've only seen the German version but at some point I'm sure there'll also be an English translation. Here are some of the noteworthy things described in more detail in the report:

Voice and SMS

  • The volume of mobile originated voice calls has reached 100 billion minutes in 2013, up by one billion from the year before.
  • The volume of fixed line calls continues to decline. A total of 169 billion minutes were recorded and out of that, international voice calls accounted for 14%. That's actually surprisingly high for me but shows that the time when nations in Europe were islands is long gone. What I didn't find in the report was the number of international voice minutes from mobile. Due to ridiculously high pricing it's perhaps not even measurable in the percentage range!?
  • For the first time ever, the number of SMS messages sent has fallen. Quite significantly, actually, from 58.9 billion down to 37.9 billion. Quite a steep decline and perhaps similar to what we've seen in Spain a year earlier. WhatsApp and Co. are showing a rather sudden effect.

Data Traffic Volumes

  • The report contains information about fixed and mobile data volume over the year. In fixed line networks, 8 billion GB (8 million TB) of IP traffic was transported (not counting the incumbent's IPTV offer, see page 75 in the report). That amounts to an average of 22 GB per household per month. The 8 billion GB of 2013 compare to 4.3 billion GB in 2012 and 3.7 billion GB in 2011. Quite an incredible and sudden increase compared to the previous years.
  • On the mobile side, 267 million GB (=0.267 billion GB) were transferred, i.e. only 1/30 of the fixed line data volume. The YoY rise was 70% and thus the rise was higher than the 56% and 53% in the previous two years. I wonder how much that has to do with network operators offering LTE as fixed line alternative in rural areas where ADSL is not available.

Revenues, Employment and Investment

  • Revenues: There's been a slight decline, about 50/50 share between fixed and wireless in the order of 25 billion Euros each in 2013.
  • Number of employees in the telecom sector: The downward trend continues, down by 3000 to 170.000 (compared to 230.000 ten years ago).
  • Infrastructure Investments: 6.4 billion Euros, about the same as in the previous 5 years and somewhat less than the 7.1 and 7.2 billion Euros that were spend in 2007 and 2008. Keep this in mind next time you hear a telecom exec complain about rising or neck breaking investment costs.


First Reports about LTE Carrier Aggregation with 3 Component Carriers

After recently reporting about the current state of LTE carrier aggregation the technology circus has moved on again and hype is building up aground aggregating 3 component carriers in three different bands. Here's a report over at Lightreading that SK Telecom in Korea is undertaking first preparations on the network side for aggregating spectrum in three different bands (800 MHz (band ?), 1800 MHz (band 3), 2100 MHz (probably band 1)) for a total bandwidth of 40 MHz.

As there are only few devices and networks out in the wild so far that bundle two component carriers (such as AT&T aggregating 10 MHz and 5 MHz in two different bands) I don't expect to see devices soon that support reception on three different bands simultaneously.But in any case an interesting development to see. Apart from a higher theoretical maximum throughput, 3 band carrier aggregation with such diverse bands cold potentially bring interesting benefits in scenarios where a user frequently moves indoors and outdoors and thus is sometimes better served on a higher or on a lower band. Sure, inter-frequency handovers can also do the trick, but perhaps there's an advantage with carrier aggregation as fewer break and make handovers are required.

How to Home-Cloud Enable Everyone To Keep Private Data Private

Cloud Services operated from home such as Owncloud for calendar and address book synchronization, filesharing, simultaneous work on documents, etc. are a great way to keep control over one's own private data. To say I'm a fan of Owncloud is an understatement. To me, having an Owncloud server at home has been an incredible enabler as I never wanted my private data to be stored, analyzed and exploited by Internet based companies.

While Owncloud is easy to use, it's unfortunately far from straight forward to install and maintain for the average person. A typical Owncloud installation at home requires the knowledge how to install Owncloud on a server, how to activate port forwarding in the DSL or cable router, how to register and configure a dynamic domain name and how to register and install an SSL certificate. Furthermore, it is not uncommon anymore that Internet service providers do not issue public IPv4 addresses to their customers anymore which requires additional measures to gain access to the Owncloud server at home from the Internet. As a consequence, people without technical background are excluded from its use.

To enable a broad audience to use an Owncloud server at home to regain control over their private data, the installation and maintenance of Owncloud must become much simpler. Over the past year I've thought a lot about this and have put together and tested the building blocks that are required to make installation and maintenance so straight forward that an average smartphone and PC user can finally have his own cloud server at home. Be warned, this is going to be a long blog post as I want to lay out my thoughts in detail.

Non-technical people don't build a server and put it into their home, they need to be able to buy it off-the-shelf. In other words, a company needs to build and sell an Owncloud@Home (o@h) box and offer the 'under-the-hood' services required such as getting a domain name, getting an SSL certificate, providing connectivity to the server at home from the outside, etc., in an as invisible  as possible way.

The Simple Order and Installation Procedure Overview

To appeal to the average non-technical user, obtaining the box and making it work it must be extremely simple, i.e. it must be no more complicated then the steps required when a user buys a new smartphone and registers for a Google/Apple/Microsoft account for the first time to use their cloud based services. Based on the building blocks I'll describe further below, the order process and installation scenario looks as follows:

  • The user buys a ready to use o@h box.
  • At home, installation is very simple: Connect the box to the DSL or cable router and power it up.
  • The user accesses the web site of the o@h service company and types in the ID number that is printed on the o@h box.
  • The user selects a domain name for the o@h box with which it will is accessible from home and from the Internet.
  • The user is then forwarded to Paypal to authorize a monthly recurring fee for the services provided by the o@h company (such as domain registration, SSL certificate registration, tunneled access, data transfer charges and online backup, etc.)
  • Once the payment process is finished, the o@h box setup is finalized and the web page displays a “ready” screen with a link to the user's o@h box. The link is also sent to the user by email.
  • The user logs into his o@h server with an initial password that can also be found on the box.
  • The installation process is finished and the user can use his Owncloud from the PC for himself and create additional accounts for family members if desired.

Cloud services are useful because they enable data sharing between the different devices of a user and for sharing data between different people. Therefore, it must also be very simple to configure smarpthones and tablets to securely connect to the o@h box. Here's how this could work, again based on the technical building blocks further described below:

The iPhone has native support for the protocols used by Owncloud for synchronizing calendars and address books. For Android, connector apps exist that add the functionality. Configuring the connectors is not difficult but not quite straight forward either and potentially simpler solutions for the Android platform could be created with little extra effort:

  • The connector apps (for Android) could be extended to have a simpler configuration option by just typing in the code printed on the o@h box and in addition the username and password of the account.

As initial configuration of other services also require a similar number of well known and simple identifiers to be entered, most users today should be comfortable with this simplified approach.

The Technical Details

To ensure privacy and confidentiality the following conditions must be met by the o@h box:

  • The fully open source Owncloud software running on Linux is used as the core of the solution.
  • While the o@h box is commercially built and distributed by a company, all software on the box itself is open source, the user has full control and can even wipe the device and install other software. This way it is possible at any time to verify that no backdoors have been put in by the company offering the o@h box.
  • The company's primary source of income to fund the work around the service is not primarily the hardware sale. Instead, the primary income comes from the service that is offered such as domain name registration, SSL certificate registration and services around secure off-site backups (e.g. encrypted backup and restore via Amazon Glacier or similar services).
  • Encryption keys are never shared with the service provider and are under full control of the user.

Having said all of this it's now time to have a closer look at how all of this can be put into practice.

Start of the Installation Process

Oah1-smWhen an uninitialized o@h box is connected to the network it establishes an encrypted connection to the provisioning server on the Internet of the o@h service company and sends an identification number (ID). This ID is the same as the ID printed on the box. This gives the service company a channel to the user's o@h box to download all required configuration information once the user has selected a domain name and has provided payment details as described above.

When the user accesses the installation web page of the service provider and has typed in the ID, the service will check if it currently has a connection to a box with the same ID. This way the service can validate that the user has typed in the correct ID. A sufficiently long and random ID further ensures that only the physical owner of the box can bring it into service. Figure one one the left shows this setup.

Selection and Allocation of a Domain Name

Being able to access the o@h box from the Internet is key as mobile devices must be able to synchronize their calendars, address books and files from anywhere at anytime. To meet this goal, the box at home must be reachable from the Internet via a domain name that the user selects during the installation process via the web page of the o@h service provider company. The service provider company must either be a domain registrar himself or have an automated interface to a third party domain registar service. Whether the domain is bound to a fixed IP address or whether this binding can be updated by the o@h box later-on in case a dynamic IP address is used depends on the connectivity implementation that is further described below.

Creation of an SSL certificate

For confidentially and privacy reasons, all data exchange between the user's devices and the o@h box at home must use a secure http connection (https). This requires that the o@h box can provide a valid SSL certificate to a web browser and other applications such address book and calender synchronization software on mobile devices that has been signed by a trusted certificate authority.  Creating an SSL certification during the installation process without involving the user works as follows:

Once the user has selected a domain name and has entered payment information, the domain name is registered. The domain name is then sent to the o@h box over the connection that exists to the commissioning server as described above. The box then automatically generates an SSL certificate for that domain and returns the public key to the commissioning server. If the service provider is an authorized certificate authority, the SSL certificate can be created locally.

If a 3rd party SSL certificate authority is used, the certificate signing request containing the public key is forwarded over an automated interface. To get a basic SSL certificate for a domain name, the certificate authority usually validates the request by sending an email to the email address that is part of the domain name record in the DNS server. The email contains a URL that has to be accessed for validation. For automated processing that does not involve the user, the email address in the domain name record in the DNS server for the domain of the o@h box must point to an email account the service provider has access to.

Once the certificate is generated, it is sent to the o@h box over the connection that exists to the commissioning server. The box then installs the keys and the certificate and restarts its internal web server.

It's important to note at this point that the private key never leaves the o@h box. As a consequence, no information is handled by the service company that could be used later on to decrypt user traffic over an https connection that is secured with the generated SSL certificate lateron.  For details see here and here.

Creation of Port Forwarding to make the o@h box accessible from the Internet

A major hurdle for the average user is to enable access to a server at home from the Internet. Typically, DSL and cable routers provide private IP addresses for the home network which are mapped to a single IP address that is visible to the outside. This is called Network Address Translation (NAT). One of the benefits, which is at the same time a major shortcoming for the o@h box at home, is that NAT only allows traffic flows that are established from the home network. Traffic arriving at the DSL or cable router that has not originated from the home network such as a connection establishment request from a mobile device that wants to synchronize the address book is blocked. This because the NAT service does not know to which internal device to forward the incoming connection request. Most DSL and cable routers today allow the creation of rules to enable such a service via their web interface. The way this is done is not standardized, however, and typically beyond the capabilities of non-technical users. There are a number of possibilities to solve this issue without requiring interaction with the user:

Alternative 1: Many Internet Service Providers (ISPs) deliver DSL and cable modems with Universal Plug and Play (UPnP) capability. UPnP enables services running on devices in the home network, among other things, to create port forwarding rules in the gateway without interaction with the user. Skype, for example, uses this port forwarding feature for direct client to client communication. Security experts recommend to disable UPnP in home routers but if activated the o@h box could make use of it.

Alternative 2: If the o@h service provider is also the user's ISP, the DSL and cable router could be configured to forward a selected incoming TCP port to the o@h box. This could be preconfigured or the router configuration could be dynamically updated during the o@h installation process in case the o@h service provider has maintenance access to the deployed DSL or cable router.

Alternative 3: In many cases, the previously discussed alternatives are not an option. This is especially the case when the Internet service provider does not assign a public IPv4 address to the user and uses a second NAT gateway at the border of his network to the Internet. This in effect prevents any externally initiated communication to the user's home network without exception.

Oah2-smAn easy solution in this scenario is to establish an SSH tunnel to an external server over which the web server tcp port of the o@h box is tunneled. The domain name of the o@h box that was registered as described above is the linked to the public IP address of the server on the Internet. All connection requests to a specific tcp port on that server are then transparently forwarded over the SSH tunnel to the o@h box at home. An end to end secure https (HTTPS) connection is used between a client device and the o@h box at home so the server on the Internet that tunnels the connection back to the home network of the user only sees encrypted data packets it can't decode. This way confidentiality and privacy is assured. This scenario is shown in the second figure.

An o@h service provider without network infrastructure could use virtual servers offered by cloud based companies. An example is the Amazon EC2 service. By mapping o@h boxes of different users to different tcp ports, a single virtual server can become the end point for hundreds and perhaps even thousands of o@h boxes. In such a scenario the number of endpoints that can be provided by a single server is limited by the number of tcp ports (65535), network capacity the virtual server has available and processing power. While the user's data would in fact traverse a could based network center in this solution, all data is encrypted and can thus not be decrypted there or anywhere else in transit.

Creating an SSH tunnel to a virtual server on the Internet and then forwarding HTTPS traffic through it to a box in the home network might sound complicated at first. In practice, however, I was surprised how easy it was to set up. I haven't blogged about this before but there'll be a follow up post that describes of how to do this.

The main disadvantage of this approach is that when a user is at home and exchanges data with his o@h box at home, it is sent via his DSL or cable link to the external server and from there back to his o@h box at home over the SSH tunnel. For synchronization of calender and address books this is of little consequence as the amount of data transferred is very small. If the user wants to store large files on the o@h box, however, performance is only acceptable if the uplink speed of the DSL or cable connection is high enough. This is usually the case if the user's home network is connected to the Internet via VDSL, cable or fiber.

Automatic Software Updates

Another important requirement when running a cloud service at home is that the software is kept up to date to prevent the user from becoming a victim of security issues that are often exploited quickly. The o@h box should thus be able to check if an update is available and update itself without user interaction. The Owncloud service has an automated process for this that must at this point, however, still be triggered by the user. Other cloud services such as WordPress have fully automated this process and thus show that a similar fully automatic service can also be created for Owncloud, either by the Owncloud communality itself or as part of the overall software solution of the o@h service provider.

Backup and Restore Service

One thing non-technical users usually do not think about is how to back-up their data until it is too late. The o@h box should therefore come with a built in service to regularly backup an encrypted copy of all data stored on the box to data storage on the web. If a strong encryption algorithm and key is used, which remains only in the hands of the user, this can be done in an automated and secure way. If the o@h service provider does not have a backup solution of his own, cloud based services such as Amazon's Glacier service could be used. Should the o@h box fail, the user could then restore his data from the web by providing the ID of the new box and the ID of the old box to the service provider via a web interface. The domain name would then be linked to the new box and a new SSL certificate can be generated as described above. The user can then access his new box and restore his data from the backup in the network by supplying the backup key to his new o@h box and not to the service provider. This ensures that only the user has access to his data.

Summary

This must have been the longest post I ever had on my blog. But this is a topic I strongly care about and I wanted to show that all the building blocks exist to home-cloud enable everyone and not only technically savvy users. I'm looking forward to see how this develops. As always, let me know what you think.

Using a Raspi as a SSH SOCKS Proxy VPN Server With Firefox

Back in March this year I had a post in which I described a backup plan to access my cloud services at home over the cellular network in case of a DSL line failure. The core of the solution is a Raspberry Pi sitting behind a cellular router waiting for an incoming ssh connection over which I can then access my other machines. The Pi allows access to other machines on the network either from the command line, or via the Pi's graphical user interface that I can forward through the ssh tunnel using VNC.

Forwarding the GUI over the tunnel is quite useful for accessing the web based user interfaces of my DSL gateway and cellular gateway routers via a web browser running on the Pi to analyze the fault and to modify port forwarding settings. A shortcoming of this approach, however, is that the web browser is quite slow on the Pi, especially when used remotely. Also, it doesn't handle some of the web page input fields very nicely, so some configuration tasks are a bit tricky. When a colleague recently showed me a much simpler and faster solution, I immediately jumped ship:

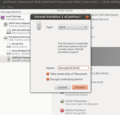
Firefox-socks-configInstead of forwarding the graphical user interface of the Pi through the ssl tunnel, the ssh client can also be used as a SOCKS proxy for Firefox (or any other browser for that matter) running on my notebook. When a web browser is used in SOCKS proxy mode, all web page requests are tunneled from the local ssh SOCKS proxy tcp port to the SOCKS proxy server running as part of the ssh daemon process.

In practice, it's surprisingly simple to set-up. On the Raspberry Pi side, no configuration whatsoever is necessary! On the client side, the command to start the ssl client as as SOCKS proxy looks as follows on the Linux command shell (on a Windows machine, Putty should do the trick):

ssh -D 10123 -p 22999 pi@my-own-domain.com

In this example, 10123 is the local port number that has to be used as the SOCKS port number in Firefox as shown in the picture on the left. The '-p 22999' is optional and is given in case the ssh server is mapped away from the standard port 22 for ssh to 10123.

In Firefox, the SOCKS proxy mode has to be configured as shown in the image. In addition 'network.proxy.socks_remote_dns' has to be set to 'true' in 'about:config' so the browser also forwards DNS requests through the SOCKS connection.

Obviously, transmitting html pages instead of screen updates over the ssh connection makes the process of interacting with the web interfaces of the remote routers a lot snappier. And by the way: The proxying is not limited to web servers in my network at home as the SOCKS server running as part of the ssh daemon on the Raspi is also happy to establish a TCP connection to any server on the Internet. Also, any other SOCKS capable program such as the Thunderbird email client can use the proxy to tunnel their traffic.

Before my colleague told me I never thought this could actually be done by ssh, as this proxying capability is not part of of the original ssh functionality. Wikipedia has a nice post on how SOCKS works: When a SOCKS capable program (e.g. Firefox) contacts the proxy for a new TCP connection for the first time from a new TCP port, it tells the local SOCKS front end which IP address and port it wants to contact. The front end then contacts the SOCKS backend over the ssh tunnel on the Raspberry Pi which in turn will create the connection to the requested IP address and TCP port. The browser then goes ahead and sends the http request over this connection. The SOCKS frontend can establish many independend TCP connections simultaneously as it can distinguish different data streams from the local TCP port the socks capable program has initially established the connection from. How nifty 🙂

C64 Vintage and Virtual Hardware For Exploring The Past

C64 and virtual 1541 drive-smBack in the early 1990's when I got my first IBM PC clone I gave little thought to transferring my documents from my previous non-IBM PC clone computers, the legendary C64 and Amiga over into the new world. I'm not sure why but it didn't seem important then. As a consequence the earliest digital records that I have on my computer today date back to 1993. Today, that's of course a bit of a pity. With a bit of luck, however, a lot of disks and tapes should still be on the attic of my parents house and at some point I'll go and get them for a closer inspection. The big questions is however, how to view and eventually migrate them to the PC!? After all, even the small 3.5 inch floppy disks in C64 and Amiga format are incompatible to the old 3.5 inch floppy format used in the PC world.

So I started a little project to get a vintage C64 back up and running again and in addition I bought a little piece of hardware that emulates a 1541 floppy drive on the C64's IEC bus and stores virtual floppy images on a standard Microsoft FAT formatted SD card. The device comes in the shape, color and design of the original 1541 floppy drive but shrunk to the size of a matchbox. Beautiful engineering and the only thing that is missing is the noise the original drive made! The smallest of SD cards will suffice to get it working, because, after all, a single 5.25 inch floppy in the C64 days could only hold around 170kb of data. There's tons of virtual C64 floppy images out there but I'm sure they'll all fit on a single 2 GB SD card. The sd2iec adapter comes with a virtual floppy image explorer that runs on the C64 to select the desired floppy image to work with. The 1541 emulator box also has a button to switch from one floppy image to the next, which is handy when programs require more than a single floppy.

An example of this is and my prime use case is GEOS, the graphical user interface of the C64 of Berkeley Softworks that very much looked like the first MacOS GUI. GEOS is booted from a start disk but all applications such as GeoWrite, GeoPaint, etc. are stored on separate disks. No problem with the push button to virtually change floppies. A floppy image of GEOS and the write and paint program are available on the net and they work perfectly on the real vintage C64 and the virtual 1541 drive. To see if I can actually export my documents that I wrote with GeoWrite at the time I created a new GeoWrite file and wrote it to the virtual disk. The content of the virtual floppy can then be imported from the SD card on the PC with 'cbmconvert'. And once that step is done, individual GeoWrite documents can be converted to a text file with a GeoWrite converter program. Unfortunately, images and and formatting are lost in the process but I guess for my purposes the text is the most important part anyway and this worked with my test document. I had a look at the Geos Programmer reference guide that is available at archive.org and luckily the file format is described there in detail. So should I want more than just the text it could be a fun project to fully convert GeoWrite files and images to something readable with a PC today.

Perfect, the proof of concept works, so the next step is to get my hands on the real files in case they still exist…

SSH Client Certificates to Talk to My Raspberry PIs

I like to interact with my Raspberry PIs at home on the shell level for lots of different things and I can't count the number of times I open a remote shell window every day for various purposes. I also like to keep my virtual desktop tidy so I usually close shell windows when I'm done with a specific task. The downside is that I have to type in the server password frequently, which is a pain. So recently a colleague of mine gave me the idea to use ssh client certificates to get rid of the password promts when I open a new ssh session to a remote server. There are a few things that have to be put into place and I thought I'd put together a quick mini-howto as the information I could find on the topic was a bit more confusing than necessary.

Step 1: Create a public/private key pair on the ssh CLIENT machine

  • Check that '~/.ssh' exists
  • Generate a public/private keypair with: 'ssh-keygen -t rsa'
  • The command generates the following two files in '~/.ssh': id_rsa and id_rsa.pub

Step 2: Put the public key part of the client on the ssh SERVER machine

  • Check that in the home folder of the user you want to login as that the .ssh directory exists
  • Then do the following:

cd .ssh
nano authorized_keys

  • Add the content of the client id_rsa.pub file to the authorized_keys file on the server side

Step 3: Configure the SSH Daemon on the SERVER machine to accept client certificates

These commands make the SSH daemon accept certificates:

  cd /etc/ssh

  sudo cp sshd_config sshd_config.bak

  sudo nano sshd_config

  –> make sure the following three lines are uncommented:

  RSAAuthentication yes
  PubkeyAuthentication yes
  AuthorizedKeysFile %h/.ssh/authorized_keys

  • Restart the SSH daemon to finish the process with: 'sudo /etc/init.d/ssh restart'

Once done, ssh can be used the same way as before but there's no password prompt anymore. Great!

Migrating My Owncloud At Home To A NUC

A little bit more than a year ago, my attitude to the "cloud" changed dramatically when a combination of an inexpensive Raspberry Pi and Owncloud enabled me to run my own calendar and contact synchronization service from a server at home. Also, exchanging large files and files between my mobile devices that I don't want to upload to a commercial server to a has become very easy, again thanks to the amazing Owncloud software.

While for contacts and calender synchronization the Raspberry Pi is fast enough, there is a noticeable delay when logging into the web interface or when someone I share a file with clicks on a link. A couple of weeks ago I decided to do something about that and started thinking about an alternative hardware setup. In the end I chose an Intel NUC (Next Unit of Computing) with a Celeron x86 processor, as it's only about twice the size of a Raspberry Pi but has significantly more processing power for the times when it's needed.

Raspi-vs-nucThe picture on the left shows the two devices side by side. In terms of power consumption there is of course a difference. The Raspberry Pi requires 2.5 watts on average when running Owncloud while the NUC requires around 6 watts. From a yearly power bill point of view that's a difference of around 10 Euros and thus quite acceptable. Unlike the Raspi, the NUC has a fan but it's almost not audbile at all and the box gets hardly warm at all, at least with the type of usage I have.

There are also NUCs with faster processors and newer architectures available, such as for example Haswell based i3 and i5 processors but they are still significantly more expensive than the older Celeron version. The NUC itself cost 139 Euros, the 32 GB mSATA SSD drive cost 35 euros and the 4 GB RAM cost another 30 Euros. In total I paid around 200 euros for the hardware which is around 6 times more expensive than a Raspi.

As far as processing speed is concerned, the difference is very noticeable. The delay of 15-20 seconds when logging-in the first time or before a web page is shown when someone clicks on a download link is now virtually gone. Also, it now only takes around 3 seconds to initially load the 300 contacts into the web interface when I click on the icon for this feature.

Server software wise I decided to go for 'Ubuntu 12.04 LTS Server' as 14.04 LTS wasn't quite around the corner when I installed the system. Installing the OS was almost a breeze but I had to do it twice as for some strange reason it couldn't write the boot sector the first time I tried. Perhaps this had something to do with disabling UEFI in the BIOS and some other boot related settings because things worked when trying once more after changing these values in the BIOS. Fortunately it's also possible to enable auto boot in the BIOS when power becomes available so a power outage doesn't leave the server out of action.

I've been running the new setup for a while now and I'm very happy with it. So if you run a similar Owncloud setup at home an need more speed I can fully recommend moving over to faster hardware at a still quite affordable price.

Peering: Who Pays Whom and Why? Level-3’s Point of View

In the past couple of weeks I had a a few posts on what peering is and who pays whom for what. Here's my book review that describes the topic in detail and here's a link to my post on the difference between network neutrality and Internet Service providers (especially in the US) trying to charge the content providers for traffic. Today I came across two posts on Level-3's blog (see here and here) that gives their perspective on the matter. An interesting read and a practical example of the theory I discussed in my previous blogs. Well worth the read!

(via 'I Cringely')

Sunspider Smartphone to Notebook Speed Comparison – 2014 Update

At the end of 2012 I had a post in which I described the results of a speed comparison between notebooks and smartphones. One and a half years later I decided it's time for another look and see if and how the world has moved on.

Again, I've been using the Sunspider test suite that runs in a web browser. Not only hardware has moved on but browsers might have a more optimized Javascript engine in the meantime and the Sunspider test suite has also been updated from version 0.9.8 used in the previous post to version 1.0.2 used in this post. At least on the notebook side it doesn't make any difference, however, as the result of the benchmark on the same Intel i3 2367M, 1.4 GHz driven notebook came in with almost exactly the same result (416 vs. 410 ms) as one and a half years ago.

So here are my 2014 results with current hardware:

178 ms, Macbook Pro, Intel i7, 2.4 GHz, Firefox 28, OS X 10.9.2

260 ms, Lenovo E330, Ubuntu 12.04, Firefox 28, 260ms (Intel i3-2348M CPU @ 2.30GHz)
534 ms, Lenovo E330, Ubuntu 12.04, virtualized Windows 7 running on the Ubuntu host)

416 ms, Lenovo E130, Ubuntu 12.04, Firefox 28, (Intel i3, 2367M, 1.4 GHz)
—> 410 ms, direct comparison to Sun Spider 0.9.8 with Firefox 16.0.2 in the previous test

411 ms, iPhone 5S (€700+), ARM64, native browser, result taken from here.

(1266 ms, Netbook,  Intel Atom N270 (first generation), 1.6 GHz, Firefox 16.0.2, Ubuntu 12.04, (2009))

1376 ms, mid-range Android 4.2.2 based smartphone (€250), Opera Mobile browser

1928 ms, low end Android 4.3 based device (€130)

The direct comparison shows that both the notebook and the smartphone worlds have moved on significantly. The iPhone 5s has twice as much single CPU power than its predecessor and my current notebook based on an i3 processor is twice as fast as the notebook I used one and a half year ago. The mid-range Android phone now has the CPU power a flagship Android smartphone had one and a half years ago. Note that I didn't measure the 2009 Intel Atom based netbook again (hence the line is in brackets) but just put it here for comparison sake to show where fast smartphones sold today are compared to netbooks of the 2009 timeframe. Quite impressive!

The State of LTE Carrier Aggregation in Practice

LTE networks are up and running for five years now and we have certainly come a long way in terms of speed, stability and usable devices since 2009. The next step in the race for ever faster speeds is Carrier Aggregation (CA), i.e. the simultaneous use of several LTE carriers in different bands. While a lot has been specified to have a lot of flexibility in practice I mainly see the following CA deployments in the field today:

South Korea and the US seem to be the countries with the most pressing need for CA as for various reasons they are limited to 10 MHz carriers. Verizon for example has thus started deploying carrier aggregation of two 10 MHz carrier, one in the 700 MHz band and one in the 1700/2100 AWS for a combined bandwidth of 20 MHz.

In Europe, Germany seems to be the country most interested in Carrier Aggregation. Here, operators already have 20 MHz carriers on air in the 1800 MHz and 2600 MHz band (bands 3 and 7). In addition, three operators have a 10 MHz carrier in the 800 MHz band (band 20). In other words, they use carrier aggregation to go beyond the 20 MHz they already have. One network operator combines spectrum in their 800 MHz and 2600 MHz for a total carrier bandwidth in the downlink direction of 30 MHz. Another operator is about to aggregate resources in the 1800 MHz and 2600 MHz band for a total of 40 MHz, i.e. twice the bandwidth that is aggregated by Verizon in the US.

So far, only few devices support Carrier Aggregation but by the end of 2014 I expect that it will be quite a handful so from my point of view this is the state of the art in deployed networks at the moment. Looking a bit into the future there are a couple of further enhancements in the pipeline. On the one hand, data transmission rates could be increased by using more than the two antennas on the base station and mobile device side. 4×4 MIMO has been trialed already but the difficulty is how to get more than the 2 antennas per sector on rooftops without increasing the size and weight of the antennas unduly. On the mobile device side there's a similar dilemma, perhaps not so much in weight but in available space for even more antennas. Time will tell. And also a bit further down the road is carrier aggregation with three independent component carriers. 3GPP has just recently standardized the new device categories 9 and 10 for the purpose with a theoretical maximum downlink speed of 450 Mbit/s (20 MHz = 150 Mbit/s, 40 MHz = 300 Mbit/s, 60 MHz = 450 Mbit/s). This whitepaper by Nomor research contains some interesting details on this.