In the previous episode, I’ve moved a WordPress Blog from the simple installation of part 1 to the more sophisticated reverse proxy setup I have put together in part 3 to demonstrate that containers are ‘portable’ between different servers with little effort. Moving the container also showed that the nginx-gen container recognizes when new containers are started and can actually access the environment of that container. It uses this information in turn to create a vhost configuration for the reverse proxy and triggers the creation of a new Letsencrypt certificate. The big question: How does the software that runs in the nginx-gen container get informed that a new container has started and how and why can it access the environment variables of another container? After all, while this is a nice functionality it also raises the question of container security and privacy. Can any container look at the inside of other containers on a server?
By default, Docker containers are completely independent from each other and can not look inside other containers and can also not see their environment variables. But how is the nginx-gen container then able to do this? The answer is ‘that there’s an API for this’. The Docker runtime offers a Unix socket in the /var/run/docker.sock part of the file system which can be accessed with http requests. Here’s an example of how to get information about all containers currently running from the host machine:
curl --unix-socket /var/run/docker.sock http://v1.24/containers/json?all=1
By default, the /var/run/docker.sock path is not available from inside containers. However, one can map this path as a volume into a container which immediately gives the container full control over the docker installation. When looking at the docker-compose.yml file from which the docker-gen container of the reverse proxy setup is started one can see this mapping:
nginx-gen:
     image: jwilder/docker-gen
     command: -notify-sighup ${NGINX_WEB:-nginx-web} [...]
     container_name: ${DOCKER_GEN:-nginx-gen}
     restart: always
     environment:
       SSL_POLICY: ${SSL_POLICY:-Mozilla-Intermediate}
     volumes:
       - ${NGINX_FILES_PATH:-./data}/conf.d:/etc/nginx/conf.d
       [...]
       - /var/run/docker.sock:/tmp/docker.sock:ro
       [...]
An incredibly powerful way to manage the setup from inside a container but you should be aware that you give this container full control over your docker installation. So better be sure what software runs in this container.
Let’s leave the security aspect aside for a moment and make some more use of the Docker control interface. While shell commands are great tools to perform specific tasks, it’s difficult to get a broader view. While researching the socket mechanism, I came across Portainer.io which offers a beautiful web based GUI for managing a Docker installation. From a container of course! An ephemeral instance can be started with a single Docker command:
docker container run -d -p 9000:9000 -v /var/run/docker.sock:/var/run/docker.sock portainer/portainer
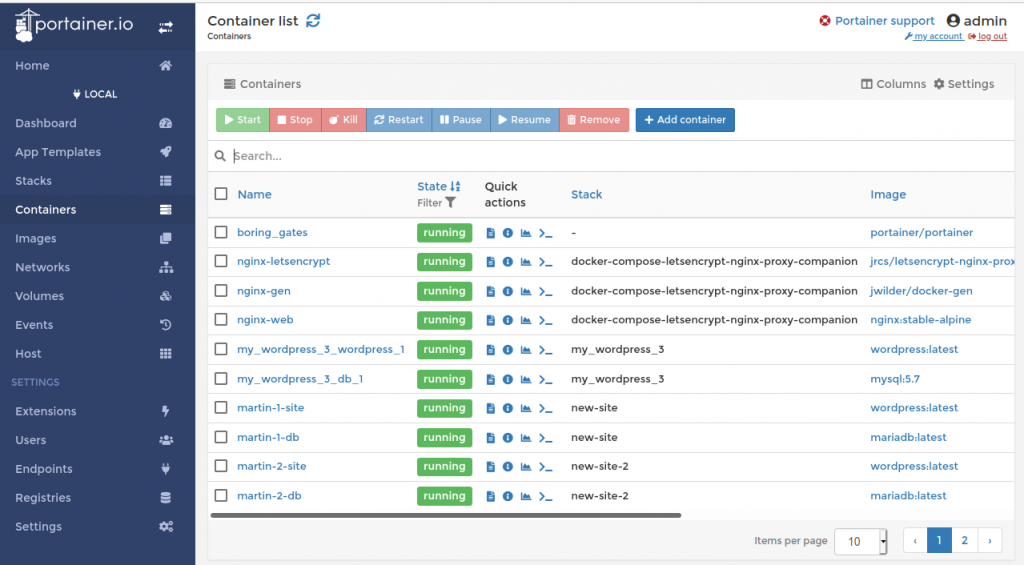
The command downloads the ‘portainer’ container from Docker hub, maps TCP port 9000 to become accessible from the outside world, and maps the Docker Unix socket into the container so it can control the Docker setup. I put a screenshot at the beginning of this post and it’s a great tool to explore which images are used by each container stack (each docker-compose.yml config), one can see all environment variables, which commands are used to build the container, etc. etc. It is even possible to open a shell in each container right in the web browser. I don’t have an opinion yet if I would use this tool for a real setup with private and confidential data, I’ll have to have a closer look the project setup and what the code does first. However, for getting experience on running many Docker containers on a single host simultaneously it is just the tool I was looking for.
Until the next episode, have fun exploring and creating!
P.S.: And just for the fun of it, here’s a docker-compose.yml file to deploy Portainer behind the reverse proxy of part 3 with persistant storage, i.e. it can be restarted and remembers the users created, etc.:
version: '3.3'
 services:
    portainer:
      image: portainer/portainer
      restart: always
      volumes:
        - /var/run/docker.sock:/var/run/docker.sock
        - ./portainer_data:/data
      environment:
        VIRTUAL_HOST: dkr-prt.domain.com
        VIRTUAL_PORT: 9000
        LETSENCRYPT_HOST: dkr-prt.domain.com
        LETSENCRYPT_EMAIL: noreply@test.com
 networks:
    default:
      external:
        name: webproxy