In part 1, I’ve given an introduction to my path to learn more about Kubernetes with a hands-on approach. The story ended with Minikube being installed and a first sample application (the ‘http echosever’) up and running in a container that is managed by Kubernetes. With all of this in place now, the next logical step is to have a closer look at the browser based Kubernetes dashboard and what it shows about this small container deployment.
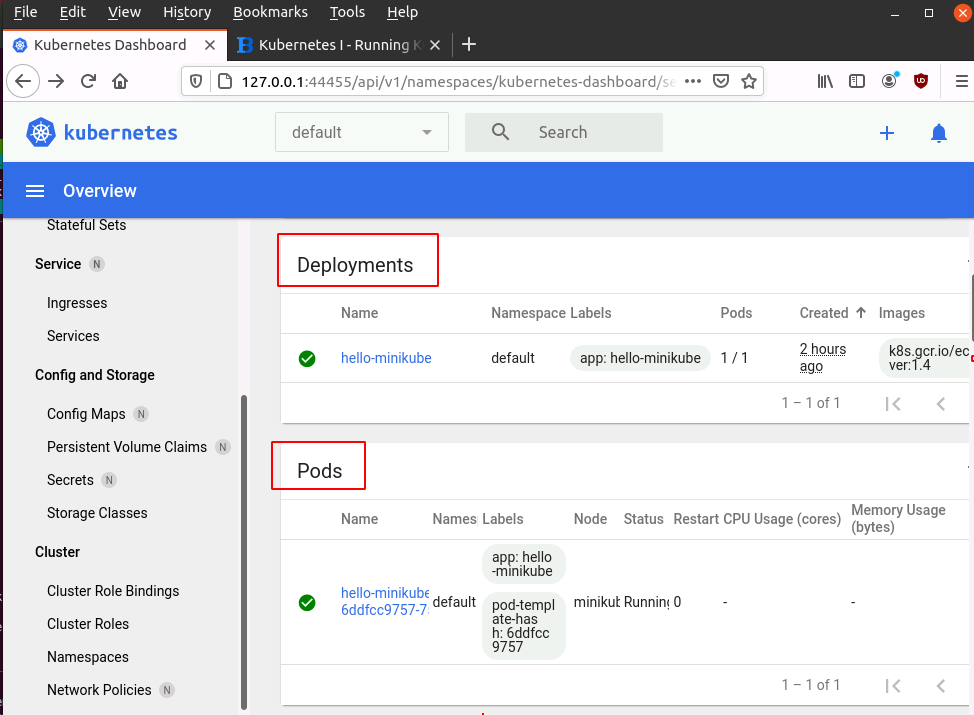
At the top of the Kubernetes dashboard there are three green circles that show the status of the most important Kubernetes concepts, Deployments, Pods and Replica sets. They are all green which is not surprising because so far we only have one each.
Deployments
When scrolling a bit further, the dashboard shows the Deployments. Let’s try to define that in easy words without looking for completeness:
A Deployment contains all information about how to manage instances of a pod that contains one or more containers. It contains information on which worker node that pod runs. If there are several instances of the same pod, the Deployment contains information how many copies of that pod are running at the same time and on which worker nodes.
At this point in time we only have one Deployment, hello-minikube. We’ve created this deployment in part 1 with the kubectl create deployment hello-minikube… command.
When you click on the hello-minikube deployment, you can see what it consists of: There are things like its name, when it was created, it’s universal ID, labels, annotations, update strategy to be applied when a new version of the deployment, etc. etc.
In case many instances of the pod should be running (e.g. for load sharing purposes), the replica-set at the bottom of the Deployment details becomes interesting. The replica-set contains information about how many instances of the pod managed by this Deployment should be spawned and maintained. Should one of the replicas fail, a new instance will be started. We only have one replica of our echoserver, so this information is not very useful in this scenario. But it shows what Kubernetes can in large clusters that run many identical pod instances for load sharing.
Pods
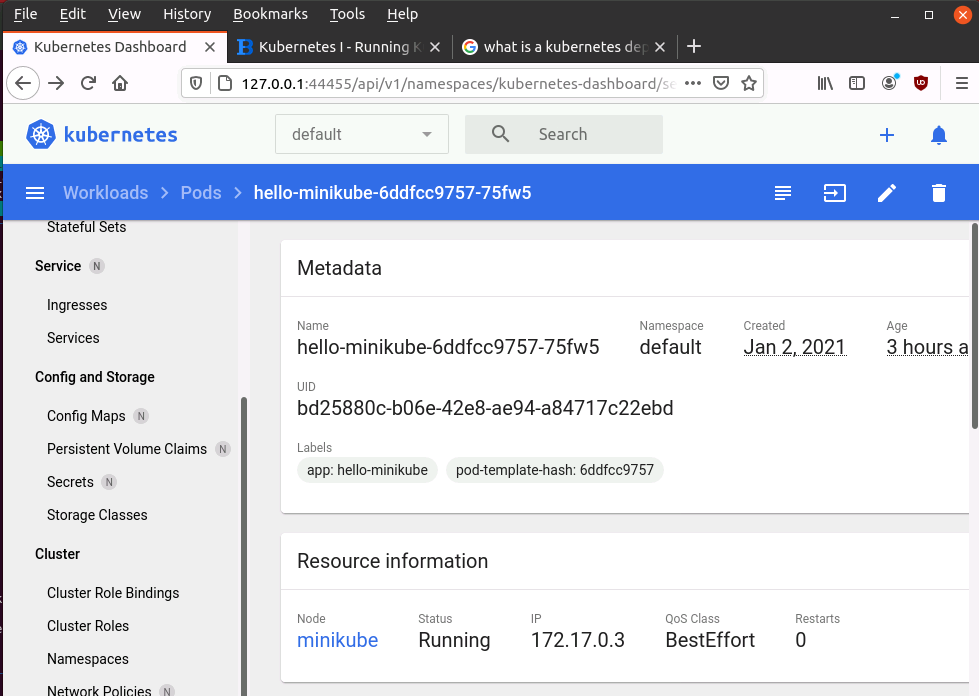
Lets go one step back in the web interface and have a look at the Pods. Again, we only have one the hello-minikube-xxxxxxx pod. That makes sense since we only have one deployment and that deployment only manages one pod instance (in which the echoserver container runs). The xxxxxx behind the pod name is the instance id. Click on it and you will get an overview about that pod as shown above. Kubernetes shows when this pod instance was created, the IP address at which it is reachable, and at the bottom, which image the container was created from. In our case that’s k8s.gcr.io/echoserver:1.4. Have a look at the commands we used in part one to launch the deployment in case you wonder where that came from.
Services
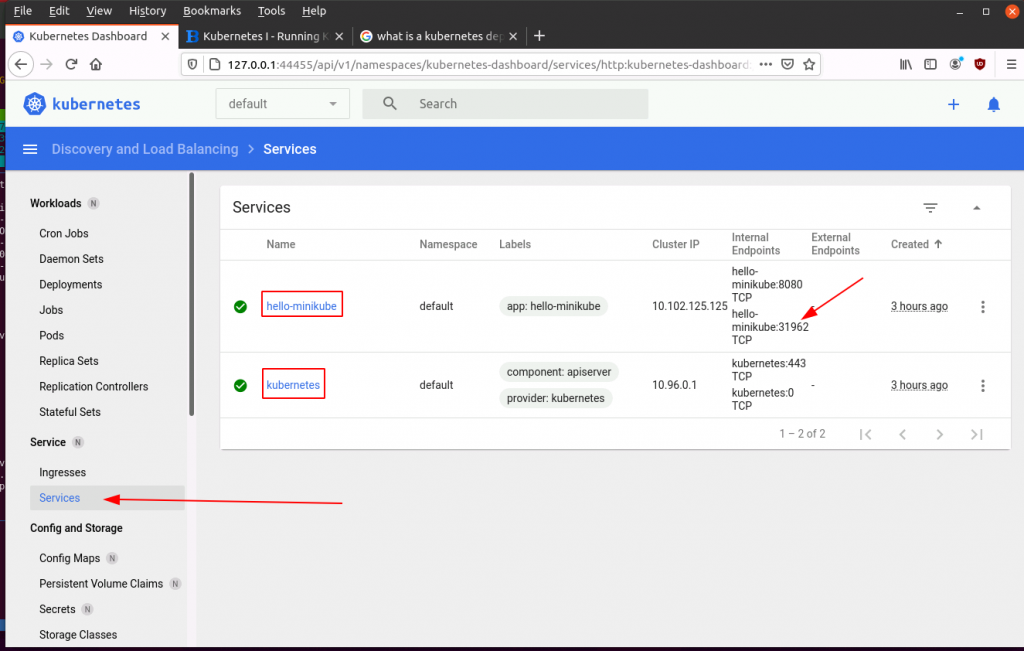
Another important Kubernetes overview screen I would like to mention in this part is “Service – Services”. A service exposes a pod to the outside world, i.e. it makes it reachable from the outside. In our example, two services are exposed to the outside world: On is hello-minikube because we have asked Kubernetes to make it available outside with the ‘minikube service hello-minikube’ command in part one. Note the TCP port number 31962 is the same as given back by the service command in part 1.
The second service that is exposed is ‘kubernetes’. That’s the pod in which the Kubernetes management part of Minikube runs in. Remember, we used the minikube dashboard command to expose it to the outside world.
Kubernetes Info on the Command Line
All of this information is available on the command line as well. Here are some commands to play around with:
# Here's the persistant storage for the Kubernetes config:
cat ~/.kube/config

kubectl cluster-info
kubectl get nodes
kubectl get pods
kubectl get services
kubectl logs <pod-name>
Coming up in part 3: How to create a Docker image (instead of just downloading it from the Docker Hub repository) and run it in our mini Kubernetes Cluster.