
When it comes to controlling or using remote PCs or servers, I use SSH connections and VNC or RDP for interaction with the graphical user interface. But there are cases when installing remote access software is not an option, or one needs to control the remote notebook / PC / server before the operating system is up and running. For such cases, remote-KVM (Keyboard, Video, Mouse) devices are the solution. There’s one brand that is quite famous for such solutions but their devices are expensive and they use a Java (!) based web browser interface. While a web browser interface is great, Java is definitely a no-go in this day and age and shows that product development must have ceased many eons ago. So I was looking for an alternative and found a cool open-source Raspberry Pi based solution: TinyPilot.
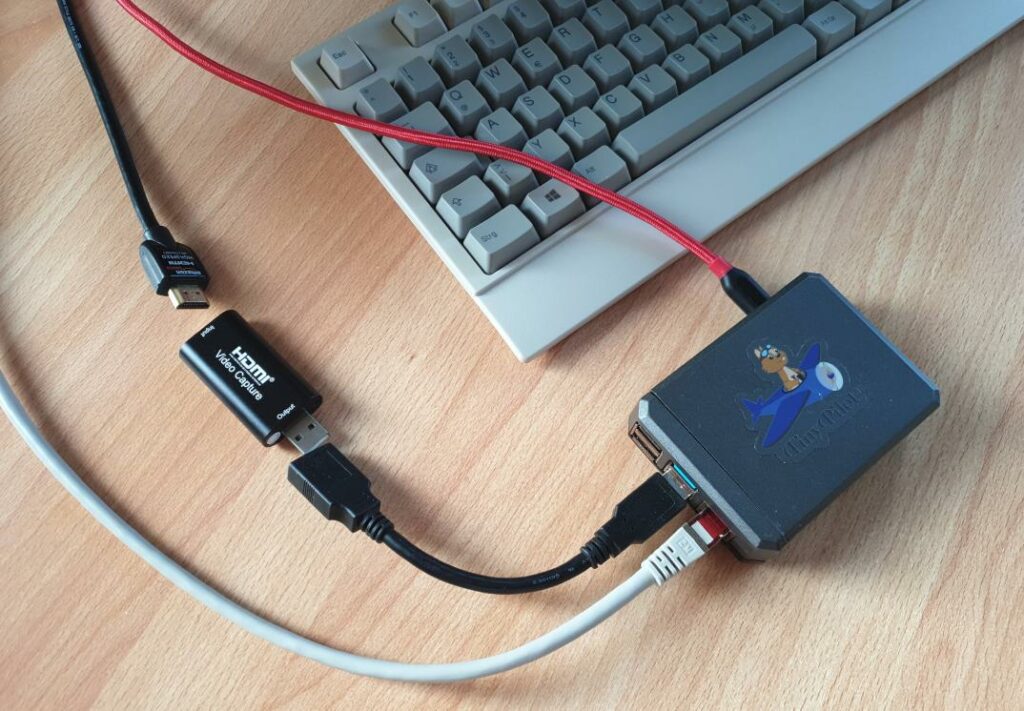
The basic idea of remote-KVM solutions is to plug them into the video, keyboard and mouse connectors of a device to be controlled remotely. In addition, the device needs network connectivity via Ethernet or Wifi for remote access. This way, one can control the notebook / PC / server in any state, install operating systems remotely and even modify settings in the BIOS menu. In practice, most servers, PCs and notebooks these days come with USB keyboard and mouse support and either a VGA, HDMI or Display Port video output. So in the easiest case, a remote-KVM device just needs 3 cables: One for the video output, one for USB to simulate a mouse and keyboard, and one Ethernet cable for remote access.
Instead of proprietary hardware and software, TinyPilot uses a Raspberry Pi 4, and the community version of the software is open source and hosted on Github. Installation based on a standard Raspbian image is child’s play and can be done with a single command straight from the source on Github. Note that a Raspberry Pi 4 is needed, as previous hardware versions do not have the ability to simulate USB devices over their USB ports. One additional piece of hardware that is required for the ‘easy use case’ above is a HDMI to USB converter. These are easy to get online and cost around 10 to 15 euros. The project’s Github page has the necessary details. So for less than 100 euros you can build yourself a fully featured remote-KVM solution!
I was a bit hesitant at first to put things together myself, so I chose to order a kit with all cables, some extra hardware and the ‘pro’ version of the software with additional features directly from the developer in the US. The other reason for doing so was to sponsor the work that has gone into this! Order fulfillment was lightning fast and delivery to Europe took just 3 days. Unfortunately, DHL then massively messed up and it took them an additional two weeks to actually deliver the parcel. Shame on you DHL! So after a week of frustration, I decided to get the Raspberry Pi and the HDMI to USB adapter from a online supplier with next day delivery and put things together myself and work with this setup for the time being.
With the Pi-4 and the HDMI adapter, it took me only a few minutes to get my remote-KVM up and running. Amazing! In addition to simulating the keyboard and mouse over USB, the Raspberry Pi is also powered over this connection. The power delivered over USB by the controlled device is sufficient for that. I’ll have a closer look at this and other technical details in a follow-up post as well.
As my main application for the remote-KVM was to control a device in the local network remotely for longer periods of time, I was not certain if the screen delay, which was indicated to be around 200 ms would be a problem. In practice, one does indeed notice the delay a bit, but I have no problem using the device on a daily basis. The standard resolution that is handled by the HDMI adapter is full-HD, i.e. 1920×1080 pixels and that’s also a comfortable resolution to work with remotely. Lower resolutions are possible as well.
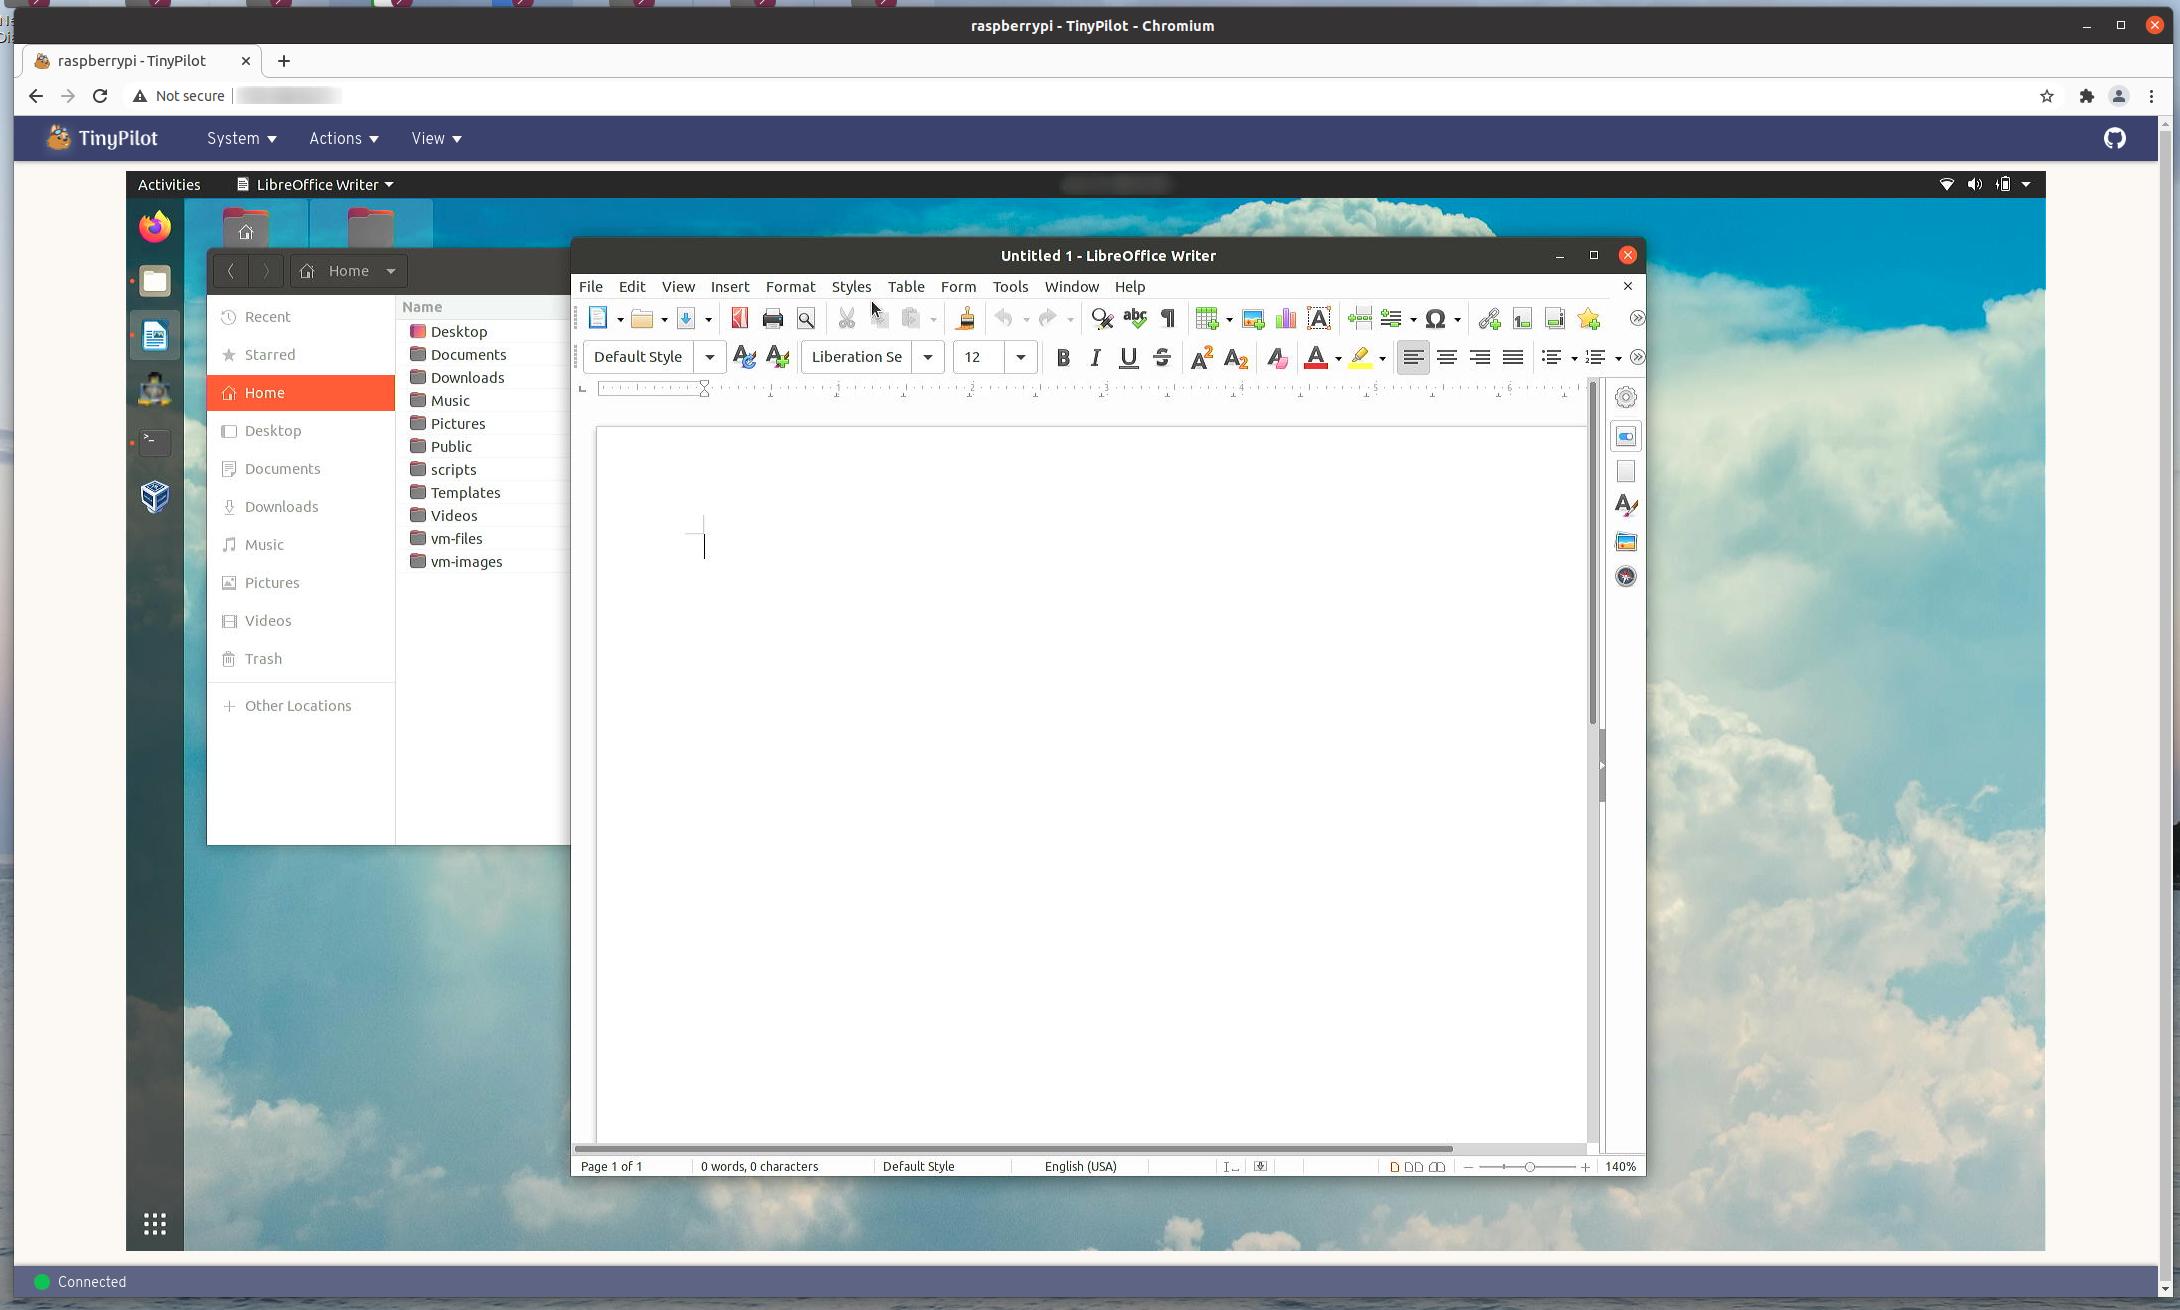
On the client, TinyPilot uses a web browser front end, so no software installation is necessary. The remote screen is zoomed seamlessly and when using the browser’s full screen mode on a full-HD client display, the zoom ratio is exactly 100% and the quality of the remote screen is very good. This way, I have no problems working on a remote machine for several hours at a time, only slightly inconvenienced by the somewhat noticeable delay.
The next thing I was not certain about was whether the data rate of streaming the screen remotely would fit my purpose. When streaming with 30 fps, the datarate on the Ethernet interface easily jumps to 50 Mbit/s. That’s not a problem if you are in the same network. However, for remote support over the Internet, that is definitely a deal breaker. However, it’s possible to reduce the frame rate to a low value, which brings down the datarate to a few Mbit/s. Still high but it probably works for support over the Internet.
Streaming to a web browser at 50 Mbit/s takes its toll on my notebook and CPU load is around 40% most of the time. This means some fan noise which is definitely not ideal. In my case, the solution to this and the high streaming data rate is to use a VNC connection to my powerful but silent ‘remote workstation’ under the desk and run TinyPilot in the web browser on that machine. All CPU intensive work is thus offloaded and the datarate required by VNC is much lower and totally usable over the Internet even at a TinyPilot frame rate of 30 fps. Perhaps a bit of a kludge but it works very well in practice.
Long story, short, I’m totally happy with this solution! And, after two weeks, DHL finally managed to deliver the parcel with the TinyPilot from the developer. I went for the “Hobbyist Kit” edition which includes a USB power splitter that is very useful in many scenarios, and which also includes the full version of the software that can also emulate USB storage devices. More about this and other technical details in a follow-up post.