I’m sure you’ve seen the one or other satellite focused post on this blog over the last year. So far, I’ve mostly been looking into handheld satellite text messaging, but I always had a close eye on Starlink as well. Recently, Starlink has lowered their prices and introduced mobile tariffs that can be activated and deactivated on a monthly basis. Mobility is important for me, as I wanted to test and potentially use satellite based Internet access in a number of different places. Also, I don’t need it all year around, so being able to only pay for the months while in use is just what I was waiting for, too. In other words, the time had come for me to order a terminal and see how it really performs in the Cologne area in Germany.
Installation
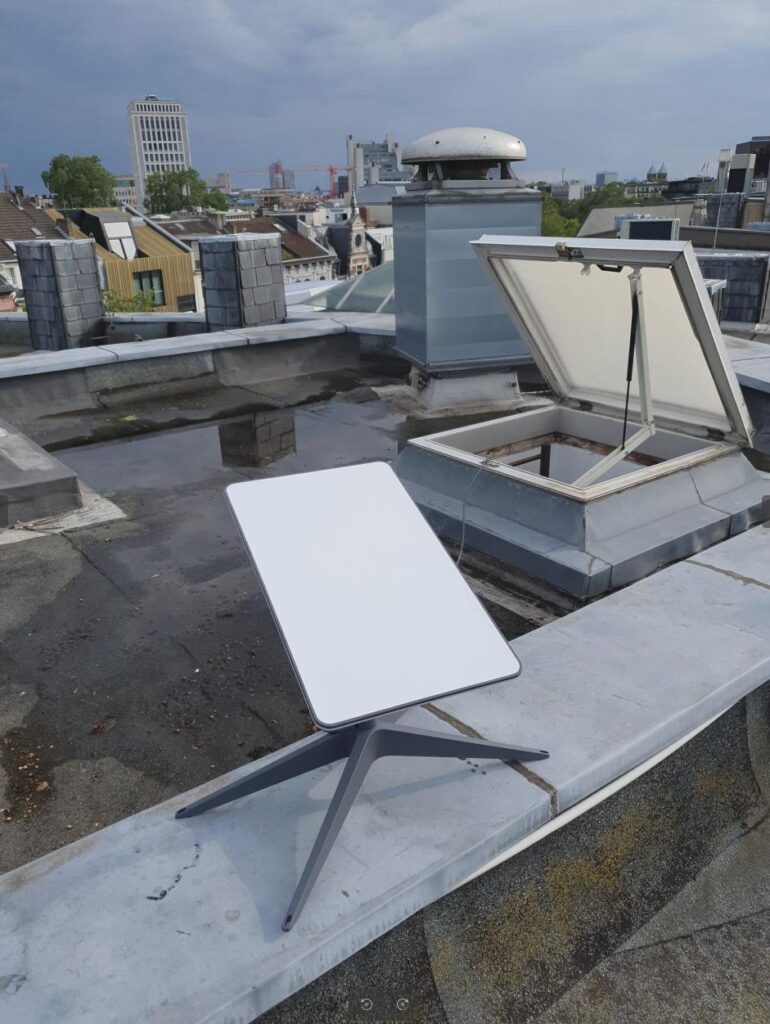
During the order process, Starlink said it would take 1 to 2 weeks to arrive, but I had the hardware in my hands within just 4 days. Excellent! So how easy is it to set-up the equipment? Well, it’s pretty much hassle free, you put the antenna on its stand, connect the combined power and network cable to the router and supply the router with power from the mains. After about two minutes, and provided enough of the sky is visible, Internet connectivity is established. As you can see in the image above, I put the antenna on my apartment’s rooftop, so most of the sky was visible without too many obstructions.
The only thing that has to be configured once is the Wifi network’s name and password. This is done when connecting to the unencrypted ‘Starlink’ WiFi network for the first time. After changing the SSID and password, the Wifi reconfigures to the new name and activates encryption.
Speed and Latency
In my first speed tests, I could easily reach speeds well over 100 Mbps in the downlink direction in Germany. Streaming works, high speed downloads work, it just felt like any other normal high speed Internet connection. In the uplink direction, I got speeds between 5 to 10 Mbps. I was a bit disappointed about that, I would have expected to see a bit more. Over the next couple of days, there were times when I could get 15-20 Mbps in the uplink direction, but it’s not guaranteed.
One more general thought on throughput: As I noted in a previous post, Starlink’s satellites offer a lot of bandwidth, but if many people in an area use the system, throughput suffers. At the time of writing, despite 3800+ Starlink satellites being in active service in July 2023, the network seems to have slowed down in some parts of the world, particularly at the US east coast, and new residential customers are put on a waiting list in such areas. SpaceX keeps adding satellites to the network on a weekly basis, so the big question in such areas is what grows faster, capacity or demand!?
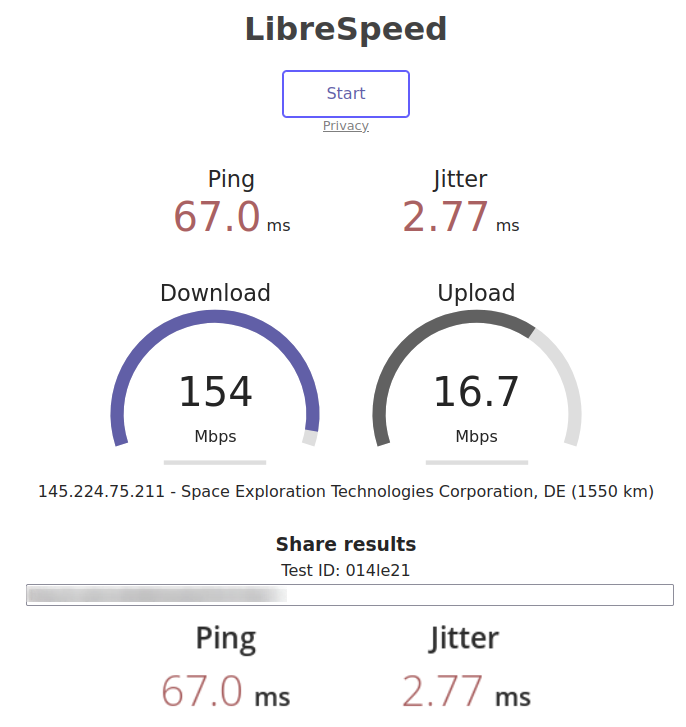
So what about latency? To be unbiased, I first accessed a number of web pages I use on a day to day basis to get a subjective impression if loading pages feels slower than over VDSL or over a mobile network . It didn’t, it just felt like normal. I then did a round trip time test from my notebook and location in Germany to my server in Hetzner’s data center in Finland. Over my VDSL connection at home, the round trip time is 35 ms. Over the Starlink connection, the round trip time is around 65 ms. That’s a bit more, but honestly, I wasn’t able to feel the difference. Perhaps it does make a noticeable difference for voice and video calls, but I doubt it.
Power Use
The router must be supplied from a 230V or 110V power source, there’s no built-in option for a 12V car battery or power over USB. While both options would make sense for many roaming use cases, using USB Power Delivery (PD) would probably be a bit of a challenge, because the 2nd generation Starlink hardware with a rectangle shaped dish requires 70+ watts after power-on and 40-50 Watts during normal operation. For many of my tests, I used an Anker 521 PowerStation to supply 230V from its built-in battery. With a capacity of around 250 Wh, it should be able to drive a Starlink installation for about 4 hours when away from the mains.
How Much of The Sky Must be Visible?
Despite so many satellites in orbit, good visibility of the sky is a must. But just how much is required for an uninterrupted service? To find out, I re-positioned the antenna from the location where most of the sky was visible behind a steep edge of the flat roof, which covers 50% of the sky. This setup was still working fine and I didn’t have an outage over the full hour I tried this configuration.
I then took the antenna below again into my apartment at the top floor of the building and positioned it at a window. The sky directly overhead is not visible, but I opened the window. I would say that a good part of the sky in the direction of the window was visible and the horizon was at a good low angle. However, this was not working at all, the system was not able to establish an Internet connection at all, even after half an hour.
And Finally…
So there we go, this is the high level data, stay tuned for future posts with a more detailed look at the system. Next up: Part 2 about how Starlink performs under various shadow conditions.
i am also wondering about the low upload speed.
Here in Hamburg a friend has always above 20mbit upload. Compared to cellular not a burner!
Hi Wolfgang, many more posts to come on the topic 🙂