In a previous post, I’ve described how to boot from a real, i.e. physical NVMe drive in a Virtualbox VM rather than using a virtual disk image. Once I figured out how to do this, I started to wonder what other useful crossings between physical and virtual machines would be possible. So here’s another one:
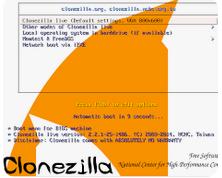
Every few months, I use Clonezilla to take a backup of the EFI- and system partitions of important PCs in my household, so I could restore a system quickly should something happen. So I wondered: Is it possible to restore a Clonezilla backup of a physical Linux installation inside a Virtualbox Guest VM on a virtual disk? The application: Test Ubuntu LTS system upgrades (e.g. from Ubuntu 20.04 to 22.04 to 24.04) on a system that is fully customized and in use, but in a virtual machine instead of on a real notebook?
This might be a bit of a strange setup, but consider this: The issue with Ubuntu system upgrades is that they can’t be undone with Clonezilla if the user directory with terabytes of data is on a separate partition of which I do not have a Clonezilla backup. System upgrades tend to change the user specific configuration quite a bit. The Firefox and Thunderbird user directories, for example, have been migrated to Snap, and hence their configuration directories move to other places in the user’s home directory. So just restoring a Clonezilla image of the EFI- and system partition will not work. But if I had a real system with a reduced amount of user data, I could create snapshots of the VM before and after upgrading and then go back and forth as I like.
In practice this actually works, but you have to ‘mind the EFI’: Initially, I created a new Virtualbox Guest VM with a virtual disk drive and then used a Clonezilla ISO image to boot from in a virtual optical drive. I then partitioned the virtual drive and restored a recent Clonezilla image of the EFI- and system partition of one of my notebooks. After that, I manually created an extra partition on the virtual drive for my home directories and restored my user data except the contents of the ‘Documents’, ‘Pictures’, ‘Videos’ and other directories with hundreds of gigabyte of data inside. This restores all configuration files in the hidden directories, including Firefox and Thunderbird configuration, history, etc.
Once done, I shut down the guest VM, removed the Clonezila ISO image from the virtual optical drive and restarted the VM. As almost expected, the installation did NOT boot at first. This is because by default, Virtualbox uses the old BIOS method to boot a system, while my real installations require a EFI to boot. However, after activating EFI in the VM’s settings as described in the previous blog post, the system booted just fine, and I had a clone of a physical notebook in a virtual machine. Perfect!!