
So how exactly did we end up with graphical user interfaces, touch screens and shell windows? Apart from improving my understanding of how a CPU really works, understanding the evolution of how users interact with a computer with a keyboard and screen, or a touch sensitive screen on mobile devices, and how this maps into hardware is a favorite past time of mine. So how did we end up with pixels?
The 1960s – From Batch Processing to Teletypes
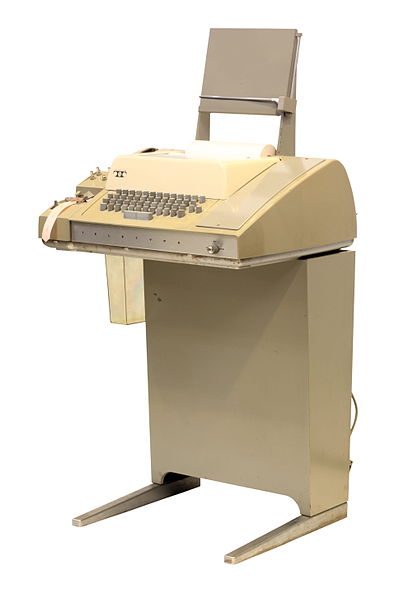
Back in the 1960s there were no pixels. There were also no screens yet and no keyboards. When looking back to early computers there were front panels with switches to ‘switch-in’ code and data, punch cards or paper tape to enter data and program code, and line printers to output the result. The next step was to connect teletype (TTY) terminals invented and in use since the 1930s to mainframe computers by connecting their serial interface to the computer instead of to another remote teletype or the telex network. This interface would later evolve to the RS-232 serial standard that those of you who grew up in the modem-age in the 1980s and 1990s will still remember.
In essence, teletype (TTY) terminals are mechanical typewriters with an electrical interface to send keyboard or paper tape input over a serial connection to another teletype, or a computer in this case, and receive characters from the other end that are then ‘typed’ onto the paper by the teletype. At around 6 characters a second, it was slow and noisy, as many Youtube videos show, but it had one major advantage over paper tape or punch card batch processing: It was interactive!
After loading a program and optionally data to process via the teletype paper taper reader, the teletype could then be used to interactively send commands such as “run program” or “modify a memory location” typed in via the keyboard to the computer and to get a response immediately. This way, it became possible, for example, to load a program, let it run and debug it in real time by setting breakpoints, observing the contents of registers, the memory and the stack, modify the program if required and let it run again. It also became possible that a program could interact with a user at run time by sending text to the teletype, waiting for keyboard input from the user and then continue running. Stephen Levy, for example, describes the joy early hackers got from this major shift away from paper tape or punched card batch processing to teletype interactivity in his book Hackers, Heroes of the computer revolution.
To interactively communicate with the computer, a program is required to receive the commands, process them, start programs and give them the ability to send output to the teletype. These programs were often referred to as ‘monitor programs’ which then developed into what we call ‘operating systems’ today.
The 1970s – From Teletype to Terminal
Teletypes in essence being typewriters, they were noisy and slow. In the 1970s, the next step in interactivity was made by replacing mechanical teletypes with CRT (cathode ray tube) screens and keyboards. This combination was referred to as a terminal. The serial interface to the mainframe and, by then, minicomputers, remained the same as for TTYs. Instead of a few characters a second, terminals could communicate over a serial interface much faster, thus significantly improving interactivity and significantly reducing the noise. Also, terminals did not produce endless paper printouts that was previously not only produced by program output but also during interactive communication with the computer.
While early terminals would be built from simple logic gates to mimic a teletype with its line by line and downwards scrolling nature, electronic miniaturization soon allowed more complex terminals that could do one important thing that again significantly improved interactivity: The location of the next character could not only move forward and back in one line and down to the next line(carriage return + line feed) but now it could also move upward and backwards! Monitor programs could now implement functionality to enable the user to modify already typed-in text, to scroll backwards through data or a program listing and modify it in place. At this point the notion of “on-screen editing” must have been born and ideas like scrolling text through the display upwards and downwards gave rise to online text editors.
TTYs and Terminals Connected to Personal Computers
Perhaps a bit surprising is the fact that the TTY and terminal approach was still used in early personal computers. The Altair 8800 that started the personal computer revolution only came with a front panel but could be equipped with a serial interface card for a TTY or terminal. Even early personal computers such as the Apple I, despite having a keyboard and screen connector did not have an embedded graphics chip but still used an IO port based interface for display output and keyboard input.
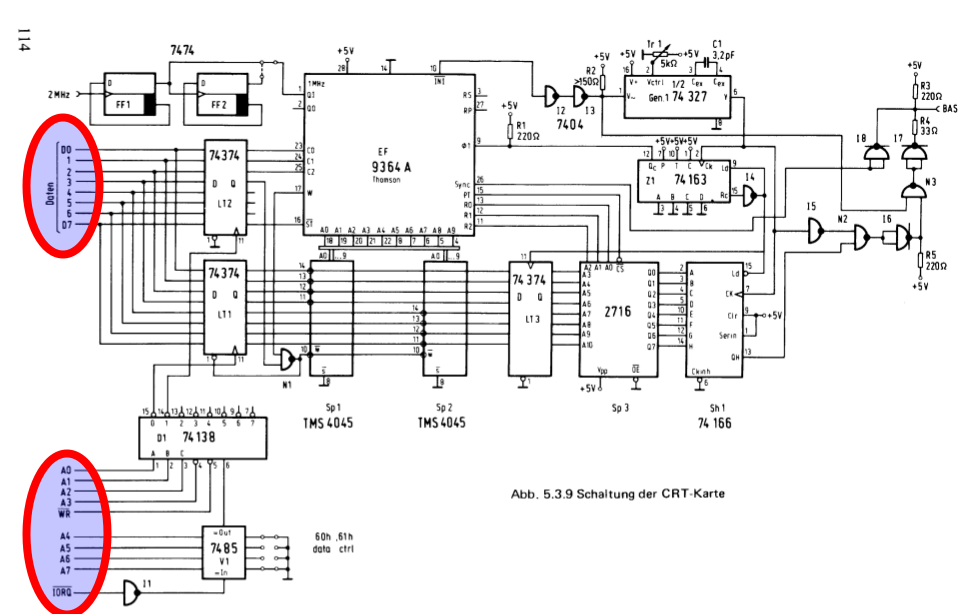
Even some ‘assemble yourself’ computer kits of the early 1980s still used a port based interface for user interaction. I recently bought a book written by Rolf-Dieter Klein in 1983/84 on how to build and program a Z80 based microcomputer (in German, Mikrocomputer selbstgebaut und programmiert, 2nd edition, Franzis Verlag, 1984, ISBN 3-7723-7162-0). In the book, Rolf-Dieter introduces three ways of connecting a display to the computer: The first is a serial interface card to which a standard terminal with keyboard could be connected to. The second option was a graphics card that used a Thomson 9364A video chip. Before reading the chapter I assumed this board would share main memory with the CPU and outputting characters to any place on the screen would be as easy as writing the ASCII code to a certain location in memory. However, this was not the case, the video chip is addressed via IO requests on a handful of IO ports. A character written to a certain port would be written by the graphics chip to the next location on the screen. The figure shown on the left taken from the book shows how the graphics card communicated with the CPU card: The 8-bit data bus transports characters and control instructions while some bits of the address bus are used to address the card. The memory chips that hold the characters are only connected to the graphics chip but not to the rest of the system. As just mentioned, the chip also supported control commands to move the cursor in any direction, including upwards. The third option described in the book is based on another Thomson video chip for vector graphics. Even though supporting non-character ‘high resolution’ video output, this chip is once again addressed via a few IO ports and not shared memory. Graphics was produced by drawing vectors (straight lines) from one xy-coordinate to another.
Character ROMs
Using a slow serial interface or a few IO ports to communicate with a screen and keyboard works well for text based user interaction. Each character to be displayed on the screen or received from the keyboard has a 5 to 8 bit code and can thus be quickly sent even over a slow interface. The terminal or graphics card then stores the character code for each location on the screen in its own memory which had to hold, for example, 40 characters on 25 lines which equals 1000 bytes. On screen each character was represented by a dot (=pixel) matrix of, for example, 8×8 = 64 pixels. The 8×8 pixel matrix for lower case and upper chase characters in addition to symbols like arrows, etc. was stored in a character ROM. To create the image on the screen the graphics chip or discrete logic would go through the characters stored in the graphics memory many times a second and use the code of each character in memory as a pointer to find the pixel matrix for a character in the character ROM, which was then put to the screen line by line.
Shared Memory between CPU and Graphics Chip
As described above it is due to historical reasons that the memory used by the CPU and the memory used for storing the information to be put on the screen was separated. This separation works well for text based output but due to its relatively low speed compared to accessing memory directly it is far from ideal for generating computer graphics that requires access to individual bits. It was thus the next logical step once integration of more and more functionality into a single chip became possible to create a hardware architecture in which the CPU and the video hardware could use a common RAM. The Commodore PET and the Apple II were two early personal computers with such an architecture in the late 1970s which then became common in the early 1980s. The C64 and pretty much all home computers from the early 1980s adopted this approach. Instead of using a single IO port to send data to the graphics chip that was no longer on a separate board or even an external terminal but on the same board as the CPU, 1000 bytes of memory beginning at a defined location in main memory was used to hold the 25*40 characters that could be displayed on the screen. A program could then simply write the character to any of those 1000 bytes with a memory store instruction to output it on the screen. The video chip would then, many times a second, access these 1000 bytes in the shared memory and generate the screen output in combination with the character ROM that contained the 8×8 pixel matrix for each character. Even basic programs could directly put a character at any location on the screen by writing to the memory location representing a certain screen location with a POKE instruction. POKE 1024,1 puts the character “A” in the top left on the screen of a C64 as shown here.
Addressing individual pixels was suddenly also possible but obviously also required more memory to represent the screen, especially for multi-color graphics, where each pixel has to be represented by more than one bit. Memory was scarce in the 1980s so lots of tricks were used that are beyond this post to reduce the number of required bits per pixel to get color graphics. Note that graphical output represented by a ‘bitmap’ in main memory was already used in the mid-1970s by the Xerox Alto but would only come to the masses in the early 1980s in the home computer area.
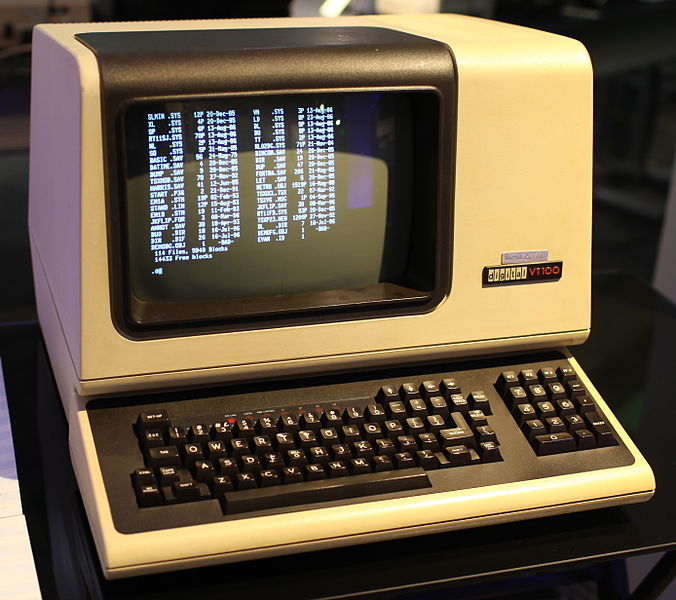
Let’s go back to the terminal approach for a second: From what I can tell there was little use of bitmap graphics in the mainframe and minicomputer domain where text based terminals would continue to dominate. Over time, text based terminals became more intelligent. A good example of this evolution is the DEC VT-100 terminal shown above. Having its own processor it could interpret ‘escape sequences’ received over the serial interface to, for example, set the color of the following characters, to make them blink, have them underlined, etc., but this is a long way from bitmaped graphics and a shared CPU/graphics memory.
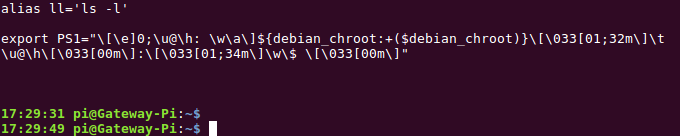
Note: Such escape codes have survived the decades and are still used today in virtual Linux and BSD terminal windows, have a look here and here for details. The screenshot on the left shows an escape code to colorize the bash prompt on one of my Linux based devices in 2017.
The Graphical User Interface And Adding Touch Input
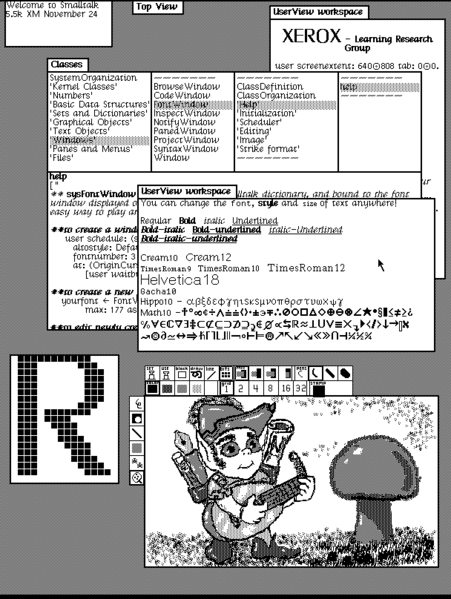
Over time, RAM became cheaper and cheaper and thus the amount of memory that could be used for representing the bits of the screen kept increasing. The Apple Lisa and Macintosh brought Xerox Alto’s graphical user interface approach to the mainstream in the mid-1980s. Other companies such as Commodore and Atari followed soon with their own graphical user interfaces and operating systems supporting them. Step by step more and more abstraction layers were put between the memory area representing the pixels on the screen and programs with graphical user interfaces to speed up application development. Even back in the 1980s most programs with a graphical user interface except for games would no longer set individual pixels directly in the video memory but would instead use an application programming interface provided by the operating system to draw drop down menus, windows, dialog boxes, etc. on the screen. Today, user space programs in multitasking operating systems are even prevented by the OS from directly accessing the screen memory to allow several programs with individual overlapping windows to use the screen simultaneously.
A Quick Look at Input Evolution
Most of this post has focused on how to output data on a screen but data input is just as important in the overall story. When moving away from the separate terminal with integrated screen and keyboard, input and output soon parted ways. Instead of using a single bi-directional serial line, the keyboard interface became separate and over time, other input devices such as mice, trackpads, joysticks and touchscreens on today’s devices opened the door to interact with a computer, be it a notebook, smartphone, tablet, etc. in many different ways.
Summary
When looking back at this evolution it becomes clear that since the beginning of the 1980s not much has changed anymore how video output is generated. The key then and now is a common memory that can be accessed by the operating system running on the CPU and also by the graphics chip. Yes, devices have become much smaller, screen resolution and color depth are beyond anything that people would have thought possible in the 1980s, graphics cards have become very powerful and include hardware and software to render and process 3D worlds and the display bitmap is now hidden below many layers of abstraction. Therefore it makes a lot of sense looking at 1980s devices where there was little yet in terms of software between the user program and the screen to understand the basic principles of how graphics is still put on the screen in today’s devices.